Gardening is no longer confined to outdoor spaces. For urban dwellers, apartment residents, and anyone with limited outdoor space, vertical gardening offers a beautiful, practical solution to keep plants thriving indoors. One of the most rewarding indoor gardening projects is building a vertical herb wall in your kitchen. Not only does it provide fresh herbs at your fingertips for cooking, but it also enhances your kitchen décor, improves air quality, and makes your space feel more vibrant.
This article will guide you step by step on how to create your own vertical herb wall, exploring design ideas, material choices, plant selection, and maintenance tips to keep your indoor herb garden flourishing year-round.
Why Build a Vertical Herb Wall?
Before diving into the “how-to,” let’s explore the “why.” A vertical herb wall isn’t just trendy—it’s practical, sustainable, and beneficial in many ways:
- Space-Saving Solution – Vertical designs maximize limited kitchen space, especially in small apartments.
- Fresh Herbs Anytime – No more store-bought bunches wilting in your fridge. You’ll always have fresh herbs at hand.
- Eco-Friendly Lifestyle – Growing your own herbs reduces packaging waste and your carbon footprint.
- Health Benefits – Indoor plants help purify the air, reducing toxins and improving humidity levels.
- Aesthetic Appeal – A green wall doubles as a striking kitchen feature, blending functionality with beauty.
Step 1: Choosing the Right Location
The success of your vertical herb wall starts with location selection. Herbs need light, warmth, and accessibility. Here’s what to consider:
- Natural Light: Most herbs thrive in 4–6 hours of sunlight. Place your herb wall near a south-facing window for maximum exposure.
- Artificial Lighting: If your kitchen lacks sufficient sunlight, supplement with LED grow lights.
- Accessibility: Position your wall so you can easily water, prune, and harvest your herbs.
- Ventilation: Ensure good air circulation to prevent mold or fungal issues.
Tip: Avoid areas directly above the stove, as heat and steam may damage delicate plants.
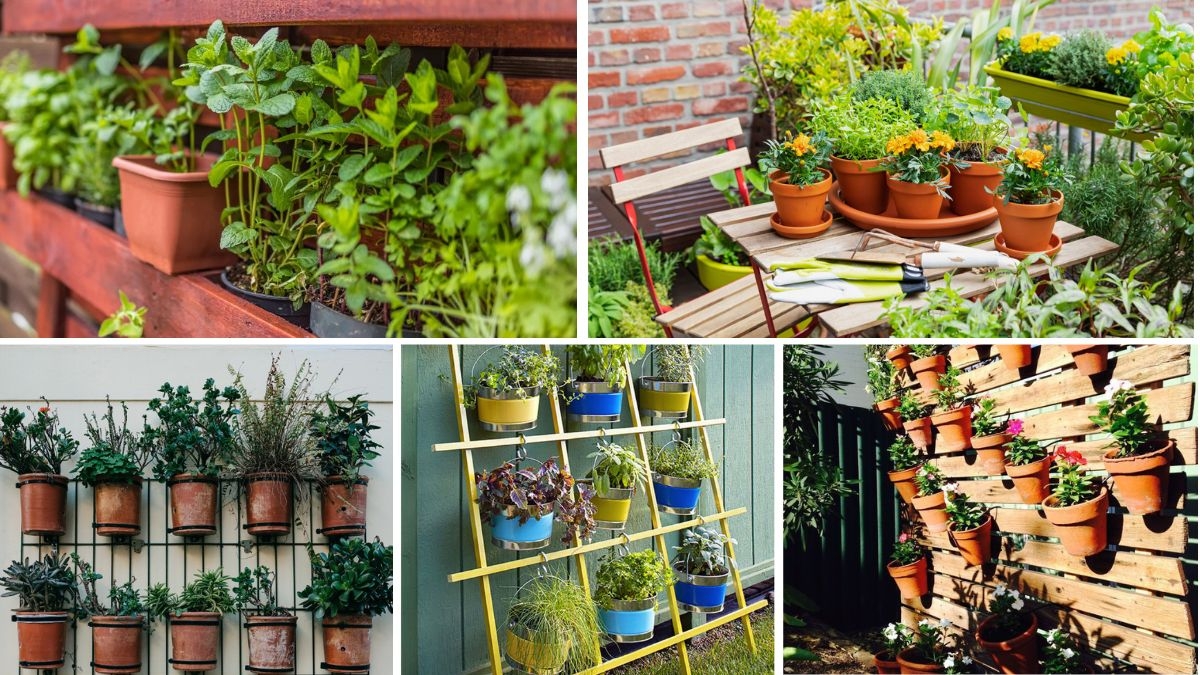
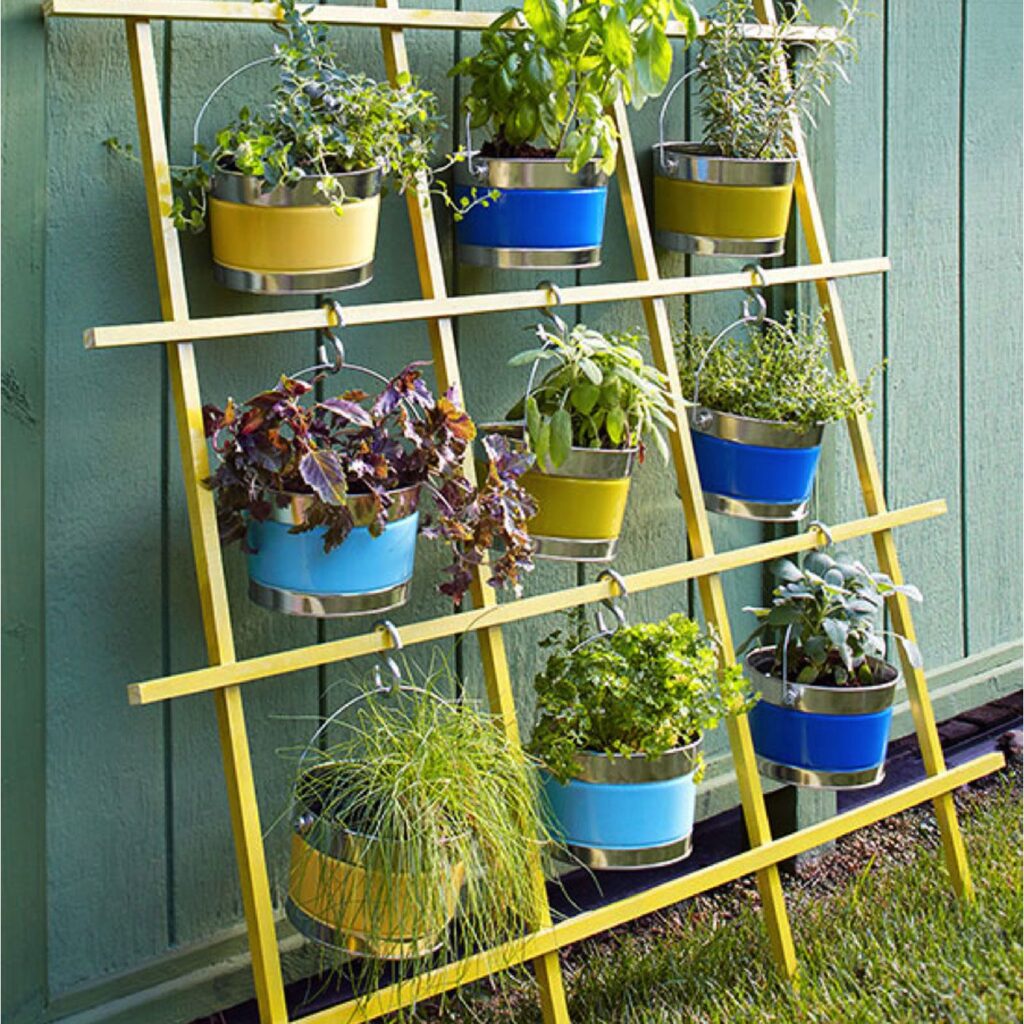
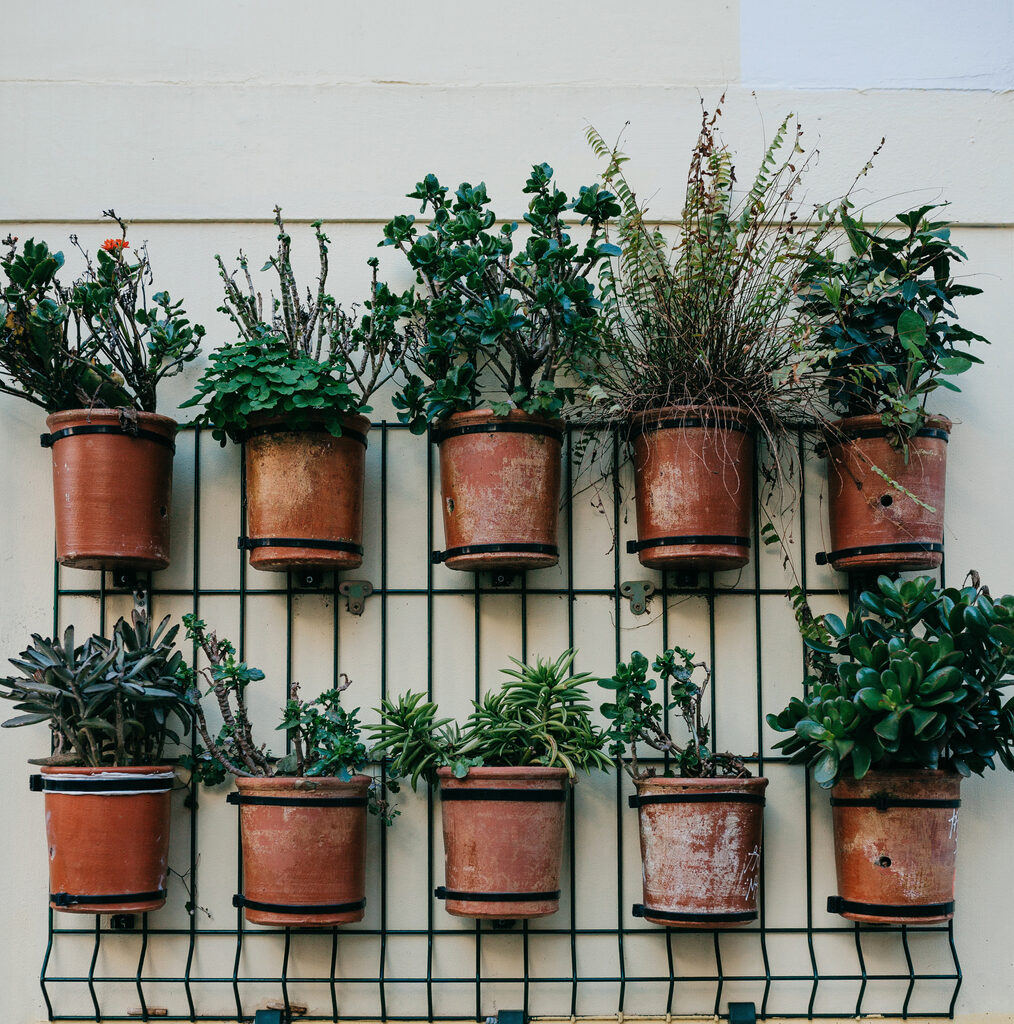
Step 2: Selecting the Structure or Framework
There are multiple ways to design your herb wall depending on your kitchen size, budget, and style preference. Here are some popular options:

- Wall-Mounted Planters
- Install small wall-mounted pots, jars, or containers on a wooden or metal grid.
- Flexible and easy to customize with paint or finishes.
- Hanging Pocket Organizers
- Fabric or felt planters with multiple pockets are lightweight and water-resistant.
- Perfect for renters since they cause minimal wall damage.
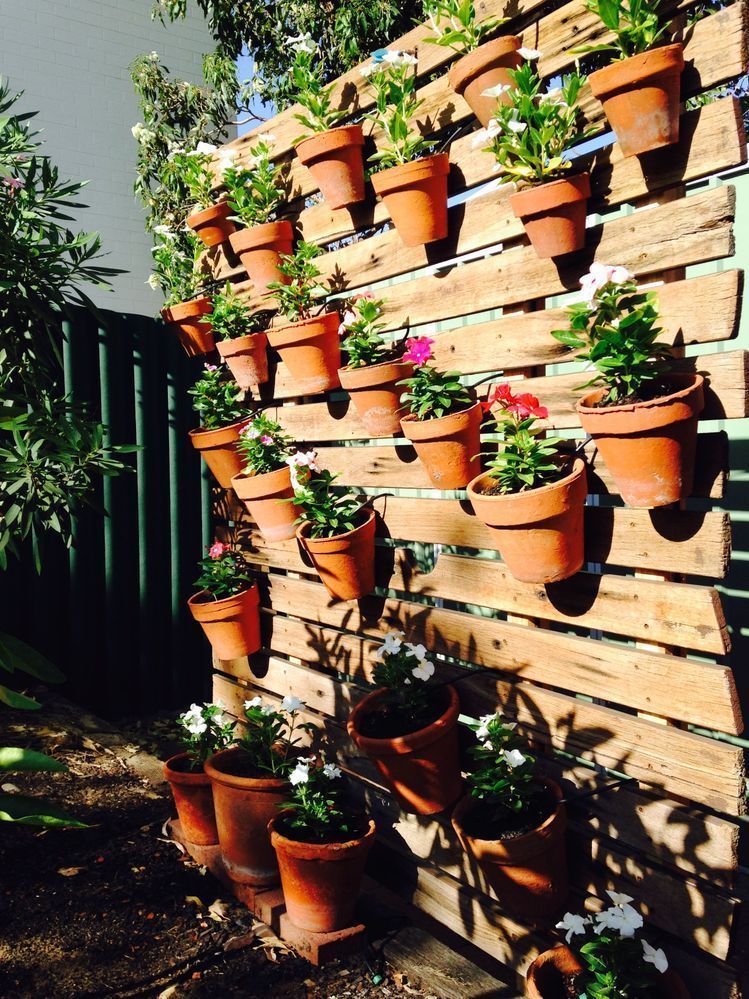
- DIY Wooden Pallet Garden
- Repurpose an old pallet, add lined compartments, and mount it vertically.
- Rustic, cost-effective, and eco-friendly.
- Magnetic or Mason Jar Herb Wall
- Attach magnetic strips to jars or cans and stick them to a metal sheet.
- Stylish and space-saving, ideal for smaller kitchens.
- Freestanding Vertical Shelf
- For those who prefer not to drill into walls, a tiered vertical stand works well.
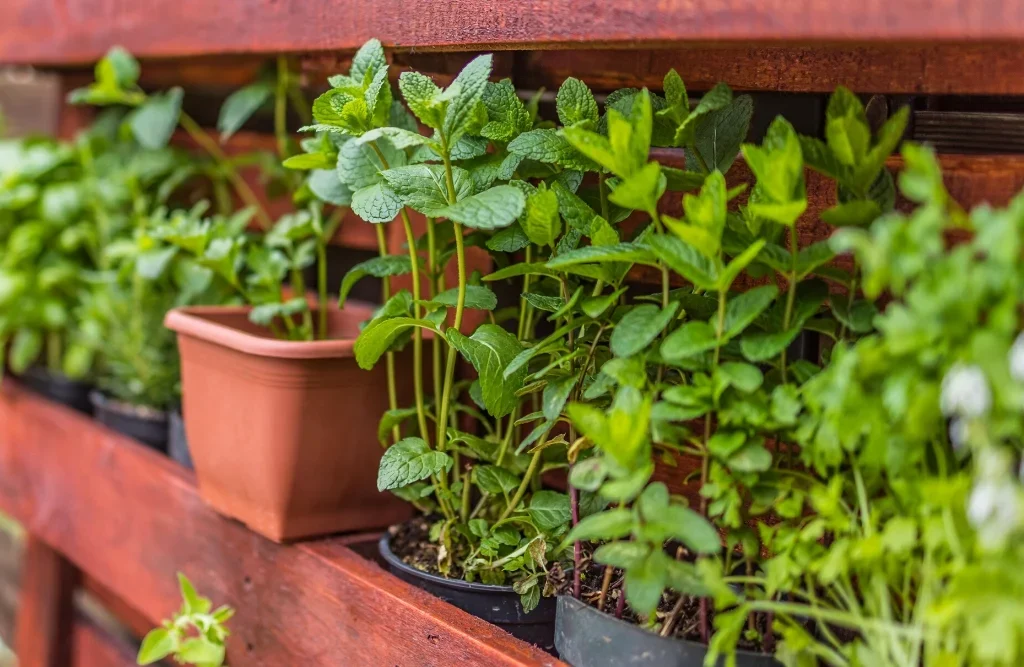
Step 3: Choosing the Right Containers
Your herb wall’s success depends on the right containers:
- Drainage: Ensure each pot has proper drainage holes to prevent root rot.
- Size: Herbs don’t need large pots; 6–8 inches in depth is usually enough.
- Material: Terracotta, ceramic, or breathable fabric pots are great choices.
- Liners: If using wood or fabric, line the inside with plastic to retain moisture.
Step 4: Selecting Herbs for Your Kitchen Wall
Not all herbs thrive indoors, so choose varieties that adapt well to container gardening. Here are some of the best herbs for your vertical wall:
- Basil – Loves warmth and sunlight, perfect for Italian dishes.
- Parsley – Hardy and versatile, grows well indoors.
- Cilantro (Coriander) – Great for Asian and Mexican cuisines.
- Mint – Refreshing, fast-growing, but requires pruning to prevent spreading.
- Chives – Easy to grow, great for garnishing.
- Thyme – Hardy and aromatic, perfect for roasts and soups.
- Oregano – Thrives in containers and enhances Mediterranean meals.
- Rosemary – Needs bright light, adds a woody fragrance and flavor.
Tip: Group herbs with similar light and water needs together for easier maintenance.

Step 5: Soil, Planting, and Watering
- Soil: Use a high-quality potting mix with good drainage. Avoid heavy garden soil.
- Planting: Sow seeds directly or transplant nursery seedlings. Ensure proper spacing so herbs don’t overcrowd.
- Watering: Herbs prefer slightly moist but not soggy soil. Overwatering is the most common mistake.
- Fertilizing: Feed your herbs monthly with an organic liquid fertilizer for consistent growth.
Step 6: Installing Lighting (If Needed)
If your kitchen lacks natural sunlight, installing grow lights is essential.
- LED Grow Lights: Energy-efficient, available in clip-on or strip forms.
- Placement: Keep lights 6–12 inches above the plants.
- Timing: Mimic natural daylight cycles by keeping lights on for 12–14 hours daily.
Step 7: Maintenance and Harvesting

Maintaining your vertical herb wall ensures longevity and steady growth.
- Pruning: Regularly trim herbs to encourage bushy growth.
- Pest Control: Watch for aphids, spider mites, or fungus gnats. Use neem oil or insecticidal soap if needed.
- Rotation: Occasionally rotate containers for even light exposure.
- Harvesting: Harvest by cutting above a leaf node. Never remove more than one-third of the plant at once.
Step 8: Adding Creative Touches
Your herb wall should be both functional and visually appealing. Consider these creative design elements:

- Labels: Use chalkboard tags, wooden stakes, or painted markers for a personalized touch.
- Decorative Pots: Mix colors and textures for a lively look.
- Integrated Shelving: Combine herbs with small kitchen décor items for a cohesive design.
- Theme Garden: Create themed walls like a Mediterranean herb wall (basil, oregano, rosemary, thyme) or an Asian-inspired wall (cilantro, lemongrass, Thai basil).
Troubleshooting Common Problems
- Herbs Turning Yellow → Likely overwatering or poor drainage.
- Leggy Growth → Insufficient light; move closer to window or add grow lights.
- Wilting Plants → Underwatering or excessive heat from kitchen appliances.
- Slow Growth → Lack of nutrients; add fertilizer.
Long-Term Benefits of a Kitchen Herb Wall
A vertical herb wall is more than a décor feature—it’s a lifestyle upgrade. Over time, you’ll notice:
- Reduced grocery costs by growing your own herbs.
- Fresher, healthier meals enhanced with aromatic flavors.
- A greener, more eco-conscious kitchen environment.
- A therapeutic and calming daily routine through plant care.
Conclusion
Building a vertical herb wall in your kitchen is a creative, practical, and rewarding project that transforms your cooking space into a fresh, green sanctuary. By choosing the right structure, selecting easy-to-grow herbs, and maintaining them with proper care, you can enjoy year-round harvests right at your fingertips. Whether you prefer a rustic wooden pallet, sleek wall-mounted jars, or a freestanding shelf, the design possibilities are endless.
With just a little effort, you’ll create not only a stunning kitchen feature but also a living pantry that elevates your lifestyle, improves your health, and makes cooking a more enjoyable experience.

Leave A Comment