Beginner’s Guide to Growing Basil Indoors

Beginner’s Guide to Growing Basil Indoors

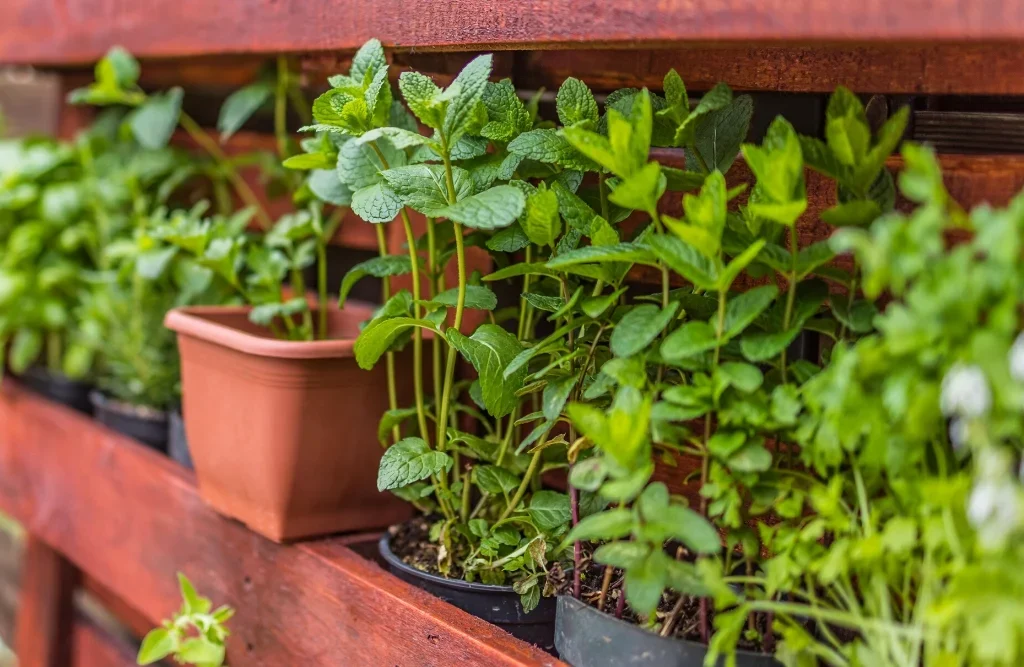
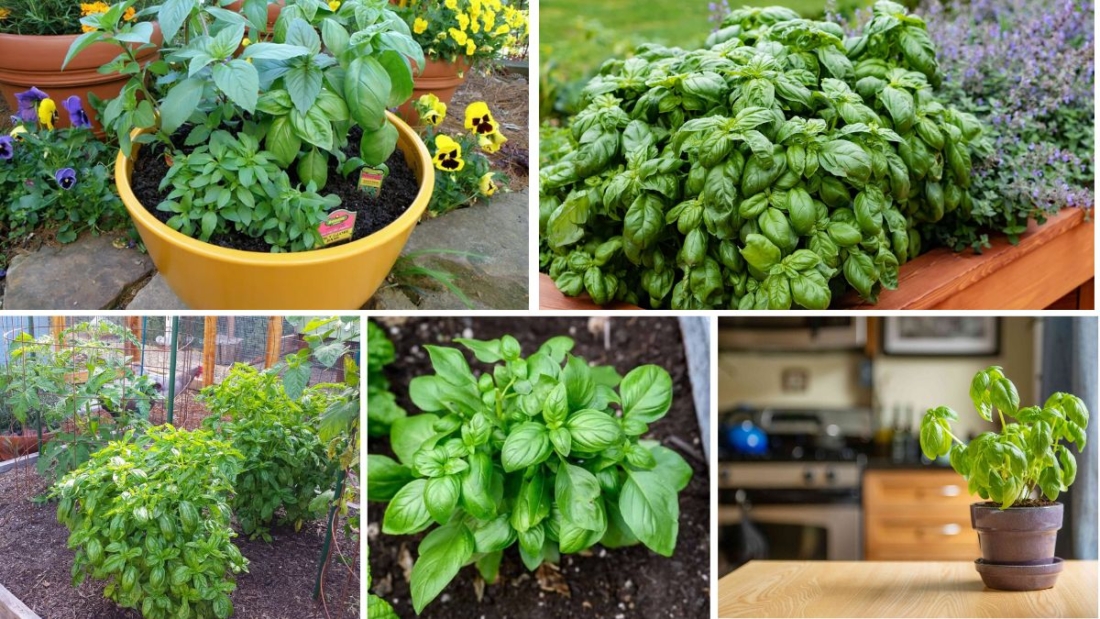
Basil (Ocimum basilicum) is a fragrant, versatile herb widely used in culinary dishes, herbal teas, and natural remedies. Known for its aromatic leaves, rich flavor, and health-promoting properties, basil has become a staple in kitchens worldwide. Indoor cultivation of basil provides fresh, readily available leaves year-round, ensures chemical-free growth, and adds greenery and pleasant aroma to indoor spaces.

This comprehensive guide offers a step-by-step approach to growing basil indoors, including selection of varieties, soil and container requirements, lighting, watering, fertilization, pruning, pest management, and harvesting techniques. It is specifically designed for beginners seeking a sustainable, rewarding indoor gardening experience.


Why Grow Basil Indoors?

Indoor cultivation of basil offers several advantages:

  1. Year-Round Access: Basil can thrive indoors regardless of outdoor weather conditions.
  2. Fresh and Healthy: Home-grown basil ensures pesticide-free, flavorful leaves.
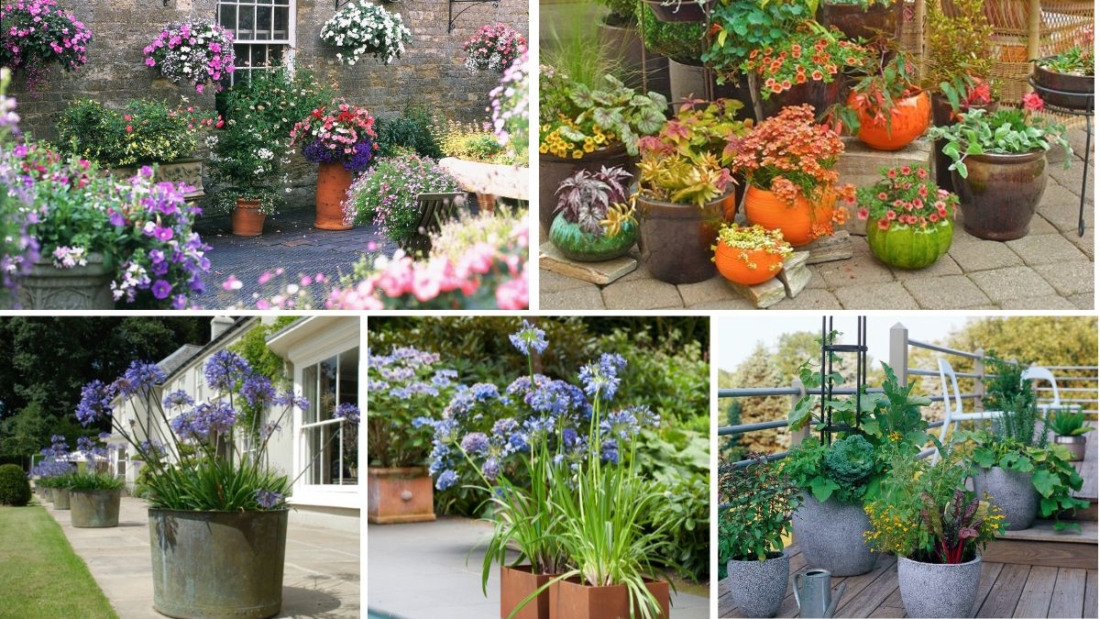
  3. Aesthetic Appeal: Adds vibrant greenery and a pleasant aroma to kitchens, balconies, or living areas.
  4. Ease of Growth: Ideal for beginners, as basil grows relatively quickly and requires minimal maintenance.
  5. Herbal Benefits: Rich in vitamins, minerals, antioxidants, and essential oils that support immunity, digestion, and overall wellness.

Choosing the Right Basil Variety

There are many basil varieties, each with unique flavors, aromas, and growth habits. Choosing the right type helps optimize indoor growth:

  • Sweet Basil: Classic culinary herb, ideal for Italian dishes, pesto, and salads.
  • Genovese Basil: Large, aromatic leaves; preferred for authentic Italian cooking.
  • Thai Basil: Distinct anise-like flavor; excellent for Asian cuisine.
  • Lemon Basil: Citrus aroma and flavor; suitable for teas, salads, and desserts.
  • Purple Basil: Decorative and flavorful; adds color to dishes and indoor gardens.

For indoor cultivation, compact varieties like dwarf basil or Genovese basil are ideal, as they require less space and adapt well to containers.


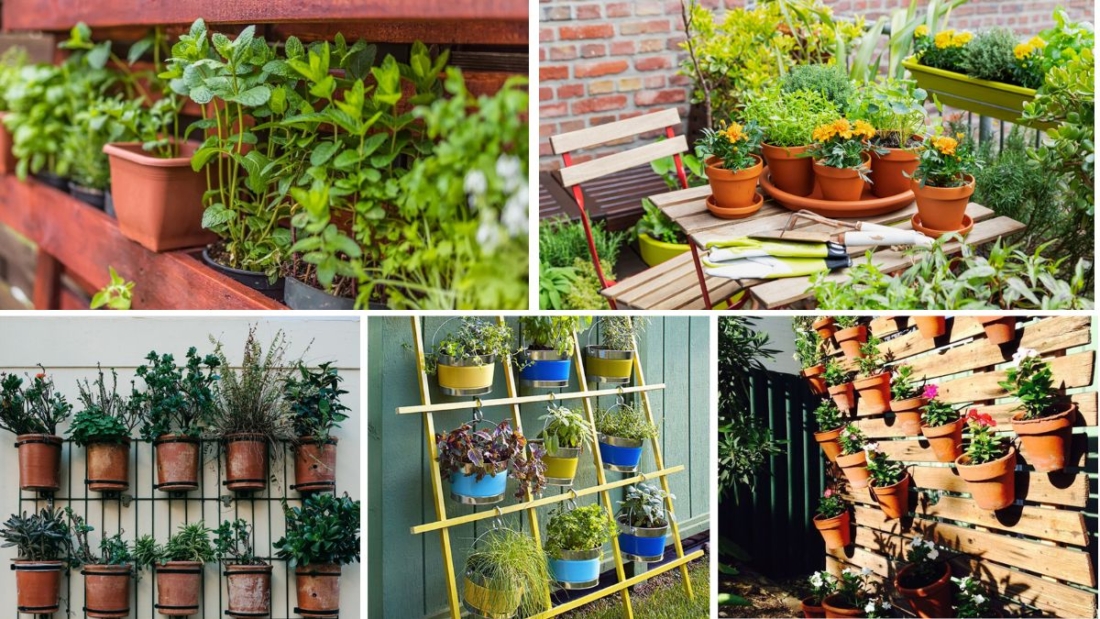
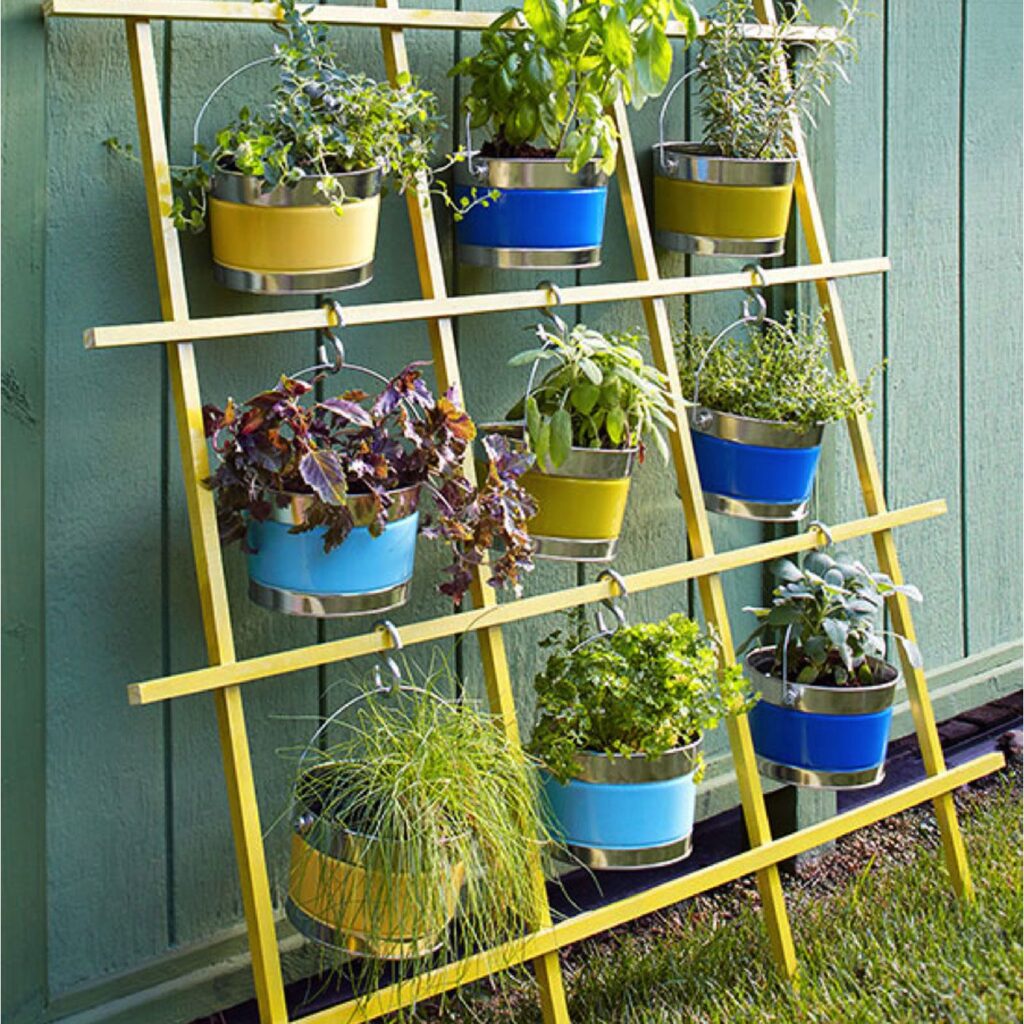
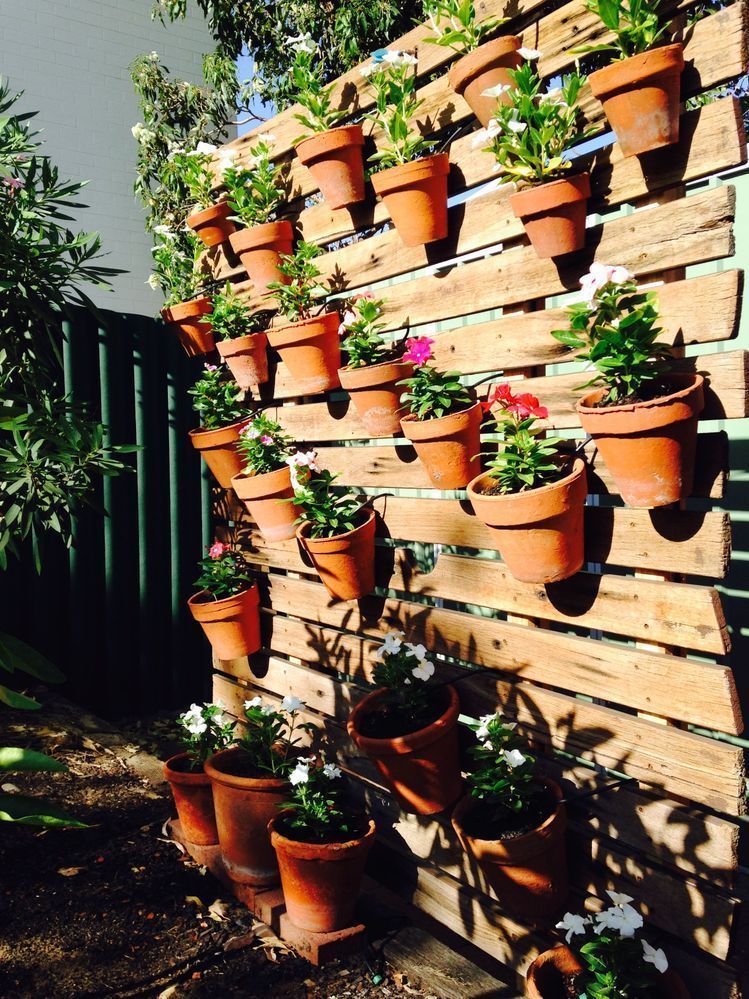
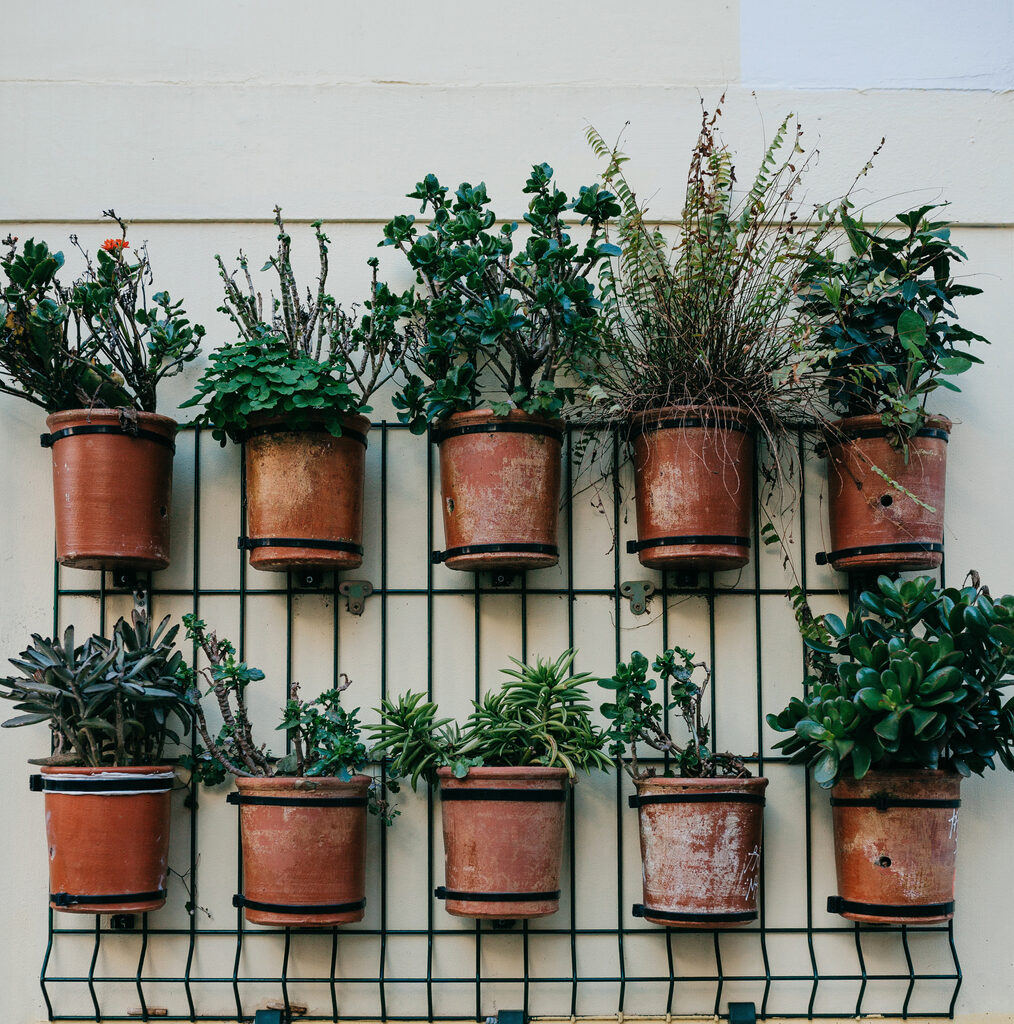
Selecting Containers for Indoor Basil

Proper container selection ensures healthy growth and prevents root problems:

  • Size: Minimum 6–8 inches in diameter for a single plant; larger pots allow multiple plants.
  • Material: Terracotta, ceramic, or plastic containers are suitable. Terracotta promotes aeration, while plastic retains moisture longer.
  • Drainage: Ensure containers have sufficient drainage holes to prevent waterlogging.
  • Mobility: Lightweight containers can be moved to optimize sunlight exposure.

Soil Requirements

Basil thrives in nutrient-rich, well-draining soil:

  • Type: Use high-quality potting mix with organic matter or compost.
  • Composition: A mix of garden soil, compost, and perlite in a 2:1:1 ratio works well.
  • pH Range: Slightly acidic to neutral (6.0–7.0).
  • Fertility: Supplement soil with balanced, slow-release organic fertilizers for continuous growth.

Avoid heavy clay soils that retain excess water, as basil roots are prone to rot.


Planting Basil Indoors

Basil can be grown from seeds or cuttings:

Planting from Seeds:

  1. Fill the container with moist, well-draining soil.
  2. Sow seeds ¼ inch deep and cover lightly with soil.
  3. Water gently to moisten the soil without displacing seeds.
  4. Maintain a temperature of 20–25°C (68–77°F) for optimal germination.
  5. Seeds germinate in 7–14 days; thin seedlings to prevent overcrowding.

Planting from Cuttings:

  1. Take healthy stem cuttings (4–6 inches long) from an established plant.
  2. Remove lower leaves to expose nodes.
  3. Place cuttings in water or moist soil to encourage root development.
  4. Transplant rooted cuttings into containers with soil.

Cuttings establish faster than seeds and ensure consistency in leaf flavor and quality.


Lighting Requirements

Basil requires ample light for strong growth and flavor:

  • Sunlight: 6–8 hours of direct or bright indirect light daily.
  • Artificial Lighting: Use LED grow lights or fluorescent lamps if natural sunlight is limited. Position lights 6–12 inches above plants.
  • Rotation: Rotate containers every few days to ensure even light exposure and prevent leaning.

Insufficient light results in weak, leggy stems and reduced flavor.


Watering Guidelines

Basil prefers consistently moist but not waterlogged soil:

  • Frequency: Water when the top inch of soil feels dry.
  • Method: Water at the base to avoid wetting leaves, which can promote fungal diseases.
  • Caution: Overwatering causes root rot and yellowing leaves; underwatering leads to wilting.
  • Humidity: Moderate indoor humidity (40–60%) is suitable; occasional misting can help in dry environments.

Fertilization Practices

Proper nutrition enhances basil growth, flavor, and aroma:

  • Type: Use a balanced, water-soluble fertilizer (e.g., 10:10:10) or organic options like compost tea.
  • Frequency: Fertilize every 3–4 weeks during active growth.
  • Avoid Over-Fertilization: Excess nitrogen promotes leaf growth but may reduce essential oils and flavor.

Pruning and Maintenance

Regular pruning encourages bushy growth, prevents flowering, and prolongs the harvest:

  • Pinching Tips: Remove the top 1–2 inches of stems when plants reach 6–8 inches tall.
  • Flower Removal: Prevent flowering to maintain leaf flavor; once flowers appear, leaves become bitter.
  • Leaf Harvesting: Harvest leaves from the top, allowing lower leaves to continue growing.
  • Cleaning: Remove yellow or damaged leaves promptly.

Pest and Disease Management

Basil is relatively resilient indoors but can encounter pests and fungal issues:

Common Pests:

  • Aphids: Remove manually or spray with neem oil.
  • Spider Mites: Maintain humidity and wipe leaves.
  • Whiteflies: Use sticky traps or organic insecticidal sprays.

Common Diseases:

  • Downy Mildew: Prevent with good air circulation and avoid wetting foliage.
  • Root Rot: Caused by overwatering; ensure proper drainage.
  • Fusarium Wilt: Use disease-free seeds or cuttings.

Regular inspection and preventive measures keep basil healthy and productive.


Harvesting Basil

  • Timing: Begin harvesting when plants reach 6–8 inches tall.
  • Method: Snip leaves above a pair of nodes using scissors or fingers.
  • Frequency: Frequent harvesting encourages new growth and bushier plants.
  • Storage:
    • Short-term: Store leaves in a damp paper towel in the refrigerator.
    • Long-term: Freeze or dry leaves for extended use.

Harvesting correctly ensures continuous supply and maintains plant vigor.


Tips for Optimal Indoor Growth

  1. Place basil in a sunny window or under grow lights for consistent light exposure.
  2. Avoid overcrowding to improve air circulation and prevent fungal problems.
  3. Rotate containers periodically for even growth.
  4. Use organic fertilizers to enhance flavor and essential oil content.
  5. Keep foliage dry during watering to reduce disease risk.

Health Benefits of Basil

  • Antioxidant-Rich: Protects cells from oxidative damage.
  • Anti-Inflammatory: Supports immune system and reduces inflammation.
  • Digestive Aid: Improves digestion and reduces bloating.
  • Mental Health: Aromatic compounds may reduce stress and enhance mood.
  • Culinary Versatility: Enhances flavor in salads, pasta, soups, sauces, and beverages.

Conclusion

Growing basil indoors is an ideal project for beginners and seasoned gardeners alike. Its ease of care, rapid growth, aromatic leaves, and health benefits make it a valuable addition to any home. By selecting suitable varieties, providing proper soil, adequate lighting, and consistent care, basil can thrive indoors year-round.

Regular pruning, proper watering, and preventive pest management ensure healthy, flavorful plants. Indoor basil cultivation not only enhances the visual appeal and aroma of living spaces but also provides fresh, nutrient-rich leaves for culinary and medicinal uses.

Following this beginner’s guide, anyone can successfully grow basil indoors, enjoy a continuous harvest, and benefit from the multiple health, aesthetic, and culinary advantages of this remarkable herb.

Step-by-Step Guide to Planting Sweet Potatoes at Home

Step-by-Step Guide to Planting Sweet Potatoes at Home

Sweet potatoes (Ipomoea batatas) are nutrient-rich tuberous root vegetables prized for their natural sweetness, versatility in cooking, and high nutritional value. Packed with vitamins A and C, dietary fiber, and antioxidants, sweet potatoes provide numerous health benefits, including boosting immunity, promoting healthy digestion, and supporting eye health. Growing sweet potatoes at home is an excellent way to ensure fresh, chemical-free produce while also engaging in rewarding gardening practices.

This comprehensive guide provides a step-by-step approach to planting sweet potatoes at home, covering soil preparation, planting techniques, care, pest management, and harvesting practices.


Why Grow Sweet Potatoes at Home?

Home cultivation of sweet potatoes offers multiple advantages:

  1. Fresh and Nutritious Produce: Enjoy pesticide-free tubers right from your garden.
  2. Cost-Effective: Reduces grocery expenses and dependence on store-bought vegetables.
  3. Sustainable Gardening: Encourages organic practices and efficient use of space.
  4. Gardening Education: Ideal for beginners and children learning about plant growth cycles.
  5. Versatile Growth: Can be grown in garden beds, raised beds, or even large containers.

Selecting the Right Sweet Potato Variety

Sweet potatoes come in diverse varieties, differing in skin color, flesh color, taste, and growth habit. Selecting the right variety ensures better adaptation to your home garden conditions:

  • Beauregard: Popular orange-fleshed variety with sweet taste; high yield.
  • Jewel: Bright orange flesh; resistant to pests and adaptable to home gardens.
  • White or Japanese Sweet Potato: Creamy white flesh, slightly less sweet; excellent for baking.
  • Purple Sweet Potato: Deep purple flesh rich in antioxidants; visually striking.

For container gardening, choose compact or early-maturing varieties, while sprawling varieties are suitable for open garden beds.


Choosing a Planting Site

Sweet potatoes require full sunlight and well-drained soil for optimal growth:

  • Sunlight: At least 6–8 hours of direct sunlight per day.
  • Soil Type: Loose, sandy loam or well-drained garden soil. Avoid heavy clay soils, which can hinder tuber development.
  • Soil pH: Slightly acidic to neutral (5.8–6.5).
  • Space Requirements: For garden beds, maintain 12–18 inches between plants and 3–4 feet between rows. For containers, use large pots at least 18 inches wide and deep.

Preparing Sweet Potato Slips

Sweet potatoes are propagated through slips (sprouts from mature tubers) rather than seeds:

Step 1: Selecting Healthy Tubers

  • Choose disease-free, mature sweet potatoes with firm flesh.
  • Avoid bruised or damaged tubers.

Step 2: Sprouting Slips

  • Place tubers in a shallow container with water or a moist sand/soil medium.
  • Submerge the bottom half in water or cover with moist soil.
  • Maintain warmth (21–27°C / 70–80°F) to encourage sprouting.
  • Slips emerge in 2–4 weeks.

Step 3: Separating Slips

  • When slips reach 6–8 inches, gently twist or cut them from the tuber.
  • Remove lower leaves and allow slips to develop roots in water or moist soil for 1–2 weeks before planting.

Soil Preparation and Bed Setup

Proper soil preparation ensures healthy growth and abundant tuber production:

  1. Clear the Area: Remove weeds, stones, and debris.
  2. Loosen the Soil: Use a garden fork or tiller to break up compacted soil.
  3. Amend the Soil: Incorporate organic compost or well-rotted manure to improve fertility and drainage.
  4. Create Mounds or Rows: Form 6–8 inch high mounds or ridges to facilitate tuber expansion and prevent waterlogging.

For containers, fill with a well-draining mix of garden soil, sand, and compost in a 2:1:1 ratio.


Planting Sweet Potato Slips

Step-by-Step Planting:

  1. Spacing: Plant slips 12–18 inches apart in garden beds or 1–2 slips per large container.
  2. Depth: Insert slips 2–3 inches deep into soil or potting mix.
  3. Watering: Water immediately after planting to settle the soil around roots.
  4. Support: No staking is required as sweet potato vines spread horizontally.

Watering and Fertilization

Watering Guidelines:

  • Keep soil consistently moist for the first 2–3 weeks to help root establishment.
  • Afterward, water moderately; avoid waterlogging as tubers may rot.
  • Reduce watering 2–3 weeks before harvest to enhance sweetness.

Fertilization:

  • Use a balanced, low-nitrogen fertilizer to encourage tuber formation.
  • Apply compost or organic fertilizer every 4–6 weeks.
  • Avoid over-fertilization, as excess nitrogen promotes foliage at the expense of tubers.

Mulching and Weed Management

  • Apply organic mulch (straw, dried leaves, or grass clippings) around plants to retain soil moisture, suppress weeds, and maintain moderate soil temperature.
  • Remove weeds carefully to prevent competition for nutrients and water.

Pest and Disease Management

Sweet potatoes are generally hardy but can face common pests and diseases:

Common Pests:

  • Sweet Potato Weevils: Bore into tubers; control with insect traps and clean cultivation.
  • Aphids: Feed on foliage; manage with neem oil or insecticidal soap.
  • Whiteflies and Caterpillars: Monitor regularly and remove manually or treat with safe organic pesticides.

Common Diseases:

  • Root Rot: Caused by waterlogging; prevent by proper drainage.
  • Fungal Leaf Spots: Remove affected leaves; avoid overhead watering.
  • Viral Infections: Use healthy slips and maintain garden hygiene.

Harvesting Sweet Potatoes

Sweet potatoes are typically ready to harvest 90–120 days after planting, depending on variety and growing conditions:

  • Indicators of Maturity:
    • Leaves may yellow and vines begin to die back.
    • Tubers reach desired size (4–6 inches long for most varieties).
  • Harvesting Method:
    • Gently loosen soil around the tubers using a fork or trowel.
    • Lift tubers carefully to avoid bruising or cutting.
  • Curing:
    • Cure tubers for 5–7 days at 29–32°C (85–90°F) with high humidity.
    • Curing improves sweetness and storage life.
  • Storage:
    • Store in a cool, dry, and well-ventilated place for several months.
    • Avoid refrigeration before curing, as it can alter taste and texture.

Tips for Successful Home Cultivation

  1. Choose disease-free, healthy slips to ensure strong growth.
  2. Provide consistent sunlight and moderate watering.
  3. Use well-draining soil to prevent rot.
  4. Mulch around plants to conserve moisture and regulate temperature.
  5. Monitor regularly for pests and prune damaged foliage.
  6. Harvest carefully to avoid bruising tubers, ensuring long-term storage.

Health and Nutritional Benefits of Sweet Potatoes

  • Rich in beta-carotene, which supports eye health and immunity.
  • High in dietary fiber for better digestion.
  • Contains antioxidants that protect against cellular damage.
  • Low glycemic index, making it suitable for blood sugar management.
  • Can be incorporated into a variety of recipes, from baking to soups and stews.

Conclusion

Growing sweet potatoes at home is a highly rewarding endeavor, combining nutritious harvests with hands-on gardening experience. By selecting the right variety, preparing soil effectively, propagating healthy slips, and maintaining consistent care, home gardeners can enjoy bountiful yields of sweet, delicious tubers.

Container or garden-bed cultivation offers flexibility, allowing both urban and rural gardeners to engage in sustainable, productive gardening. With careful watering, fertilization, pest management, and timely harvesting, sweet potatoes can thrive in any home environment, providing a continuous supply of healthy, flavorful produce.

Home-grown sweet potatoes not only promote healthy eating but also encourage self-sufficiency, making them a valuable addition to any home garden. Following this step-by-step guide, gardeners can achieve a successful and enjoyable sweet potato cultivation experience year after year.

Complete Guide to Caring for Snake Plants Indoors

Complete Guide to Caring for Snake Plants Indoors

Snake plants (Sansevieria spp.), also known as mother-in-law’s tongue or viper’s bowstring hemp, are among the most popular and resilient houseplants worldwide. Beloved for their sleek, upright foliage, ease of care, and remarkable air-purifying abilities, snake plants have become a staple in modern interior decor. They not only enhance aesthetics but also contribute to a healthier indoor environment by removing toxins such as formaldehyde, benzene, and xylene from the air.

Indoor cultivation of snake plants is ideal for beginners and experienced gardeners alike, as these plants thrive in low-maintenance conditions while requiring minimal attention. This guide provides a complete overview of caring for snake plants indoors, including lighting, watering, soil requirements, propagation, pest management, and general maintenance.


Why Snake Plants Are Ideal for Indoor Spaces

Snake plants are uniquely suited for indoor environments due to several characteristics:

  1. Low Maintenance: Can survive neglect, low light, and irregular watering.
  2. Air Purification: Proven to filter indoor toxins, improving air quality.
  3. Adaptable to Lighting Conditions: Tolerates low, medium, and bright indirect light.
  4. Decorative Appeal: Upright, sword-shaped leaves and variegated patterns suit modern and traditional interiors.
  5. Durability: Resistant to most pests and diseases, making them excellent for busy households.

Choosing the Right Snake Plant Variety

There are numerous snake plant varieties, each with distinct foliage patterns and sizes:

  • Sansevieria trifasciata ‘Laurentii’: Classic variety with yellow-edged leaves.
  • Sansevieria trifasciata ‘Moonshine’: Silvery-green leaves, popular for modern decor.
  • Sansevieria trifasciata ‘Hahnii’: Compact, bird’s nest form suitable for tabletops and shelves.
  • Sansevieria cylindrica: Cylindrical, fan-shaped leaves with unique architectural appeal.
  • Sansevieria trifasciata ‘Black Gold’: Dark green leaves with golden margins, striking visual contrast.

Selecting a variety depends on available space, decorative preference, and growth habit. Compact varieties are ideal for small apartments, while larger types make bold statement pieces in living areas or offices.


Lighting Requirements

Snake plants are highly adaptable to indoor lighting:

  • Bright, Indirect Light: Ideal for vigorous growth and robust coloration.
  • Moderate Light: Most common indoor locations like offices or living rooms are sufficient.
  • Low Light: Snake plants tolerate shaded corners, though growth may slow.
  • Avoid Direct Sun: Prolonged direct sunlight can scorch leaves.

Rotating the plant occasionally ensures even growth and prevents leaning toward the light source.


Soil and Container Requirements

Snake plants prefer well-draining soil to prevent root rot:

  • Soil Type: Use cactus or succulent mix, or prepare a mix of potting soil, sand, and perlite in equal parts.
  • Container:
    • Must have drainage holes.
    • Terracotta pots are excellent for moisture control.
    • Size: Choose a pot 2–4 inches larger than the root ball; snake plants prefer slightly snug containers.

A suitable container with proper soil ensures aeration, prevents water accumulation, and promotes healthy root development.


Watering Guidelines

Snake plants are drought-tolerant and require careful watering practices:

  • Frequency: Water once every 2–4 weeks, depending on indoor temperature and humidity.
  • Check Soil Moisture: Allow the top 2–3 inches of soil to dry completely between waterings.
  • Avoid Overwatering: Too much water leads to root rot, yellowing leaves, and mushy stems.
  • Winter Care: Reduce watering during dormant months.

Tip: Water at the base of the plant rather than over the leaves to avoid fungal issues.


Temperature and Humidity

  • Ideal Temperature: 18–27°C (65–80°F).
  • Tolerance Range: Can survive 10–35°C (50–95°F) but may grow slowly outside optimal conditions.
  • Humidity: Average indoor humidity is sufficient; snake plants do not require high humidity.

Avoid placing the plant near air conditioners or heaters, as sudden temperature fluctuations can stress it.


Fertilization Practices

While snake plants are low-maintenance, occasional fertilization encourages growth:

  • Fertilizer Type: Use a balanced, water-soluble fertilizer diluted to half strength.
  • Frequency: Every 6–8 weeks during the growing season (spring and summer).
  • Winter Care: Avoid fertilization during dormant months to prevent over-fertilization.

Excess fertilizer may cause leaf burn or salt buildup in the soil, so moderation is key.


Propagation Techniques

Snake plants are easily propagated, making them ideal for sharing or expanding indoor greenery:

  1. Leaf Cuttings:
    • Cut a healthy leaf into 2–3 inch sections.
    • Let the cut ends dry for 1–2 days.
    • Plant in well-draining soil; roots develop in a few weeks.
  2. Division:
    • Remove the plant from its container.
    • Separate root clusters carefully.
    • Replant divisions in fresh soil.
  3. Water Propagation:
    • Place cuttings in water until roots develop.
    • Transfer to soil once roots are 1–2 inches long.

Propagation is simple and reliable, making snake plants a sustainable and renewable indoor plant choice.


Pruning and Maintenance

Pruning maintains plant health and aesthetics:

  • Remove Damaged Leaves: Cut yellow, brown, or diseased leaves at the base.
  • Control Size: Trim tall leaves to maintain shape and fit your space.
  • Cleaning Leaves: Wipe leaves with a damp cloth to remove dust and enhance photosynthesis.

Regular pruning encourages vigorous growth and ensures the plant remains visually appealing.


Pest and Disease Management

Snake plants are resilient but may occasionally face minor issues:

  • Common Pests: Mealybugs, spider mites, and scale insects.
    • Treat with neem oil, insecticidal soap, or wipe affected areas manually.
  • Diseases: Root rot from overwatering; fungal leaf spots are rare.
    • Use well-draining soil, avoid waterlogging, and remove affected leaves.

Routine inspection helps prevent infestations and maintains a healthy plant.


Benefits of Snake Plants Indoors

  1. Air Purification: Removes formaldehyde, benzene, and other toxins, improving indoor air quality.
  2. Low Maintenance: Thrives with minimal care, ideal for busy lifestyles.
  3. Aesthetic Value: Architectural foliage adds elegance to homes, offices, and commercial spaces.
  4. Stress Reduction: Indoor greenery enhances mood, reduces stress, and promotes relaxation.
  5. Improved Sleep: Releases oxygen at night, contributing to better indoor air quality for bedrooms.

Tips for Optimal Indoor Growth

  1. Rotate plants occasionally for uniform growth.
  2. Avoid overcrowding pots to prevent competition for nutrients.
  3. Use well-draining soil and pots with drainage holes.
  4. Place near indirect sunlight; avoid harsh midday sun.
  5. Fertilize sparingly during the growing season.

Conclusion

Snake plants are among the most versatile, resilient, and beneficial indoor plants. Their minimal care requirements, air-purifying abilities, and striking appearance make them ideal for urban homes, offices, and indoor spaces of all sizes.

By selecting the right variety, providing suitable soil, managing watering and light, and implementing simple maintenance practices, snake plants can thrive indoors year-round. Propagation is straightforward, allowing gardeners to expand their plant collection easily.

Whether you are a beginner seeking a low-maintenance houseplant or an experienced indoor gardener looking to enhance air quality and aesthetics, snake plants offer a perfect combination of beauty, health benefits, and resilience. With proper care, these elegant plants will continue to grow, purify the air, and bring greenery and tranquility to your indoor environment for many years.

Complete Guide to Growing Dragon Fruit in Containers

Complete Guide to Growing Dragon Fruit in Containers

Dragon fruit, scientifically known as Hylocereus spp., is a strikingly beautiful and exotic fruit that belongs to the cactus family. With its vibrant pink or yellow skin and speckled white or red flesh, dragon fruit has gained global popularity for its unique appearance, refreshing taste, and numerous health benefits. Rich in antioxidants, vitamin C, fiber, and essential minerals, dragon fruit is not only a nutritious addition to the diet but also a profitable fruit for home gardeners and commercial growers alike.

Container gardening has emerged as an effective method for growing dragon fruit, especially for urban dwellers, balcony gardeners, or regions with limited space. This guide provides a complete, step-by-step approach to growing dragon fruit in containers, covering selection, planting, care, and harvesting practices.


Why Grow Dragon Fruit in Containers?

Container gardening offers several advantages:

  1. Space Efficiency: Ideal for apartments, patios, or small yards.
  2. Mobility: Containers can be moved to optimize sunlight exposure or protect plants from adverse weather.
  3. Soil Control: Allows precise management of soil composition and drainage.
  4. Pest Management: Easier monitoring and control of pests and diseases.
  5. Aesthetic Appeal: Dragon fruit cacti have a climbing, ornamental growth habit, adding beauty to balconies and gardens.

Choosing the Right Dragon Fruit Variety

Dragon fruit varieties vary in skin color, flesh color, and taste. For container cultivation, consider compact and manageable varieties:

  1. Hylocereus undatus (White Flesh): Most common; pink skin with white flesh. Sweet and mild flavor.
  2. Hylocereus costaricensis (Red Flesh): Pink skin with deep red flesh; sweeter and richer in antioxidants.
  3. Hylocereus megalanthus (Yellow Dragon Fruit): Yellow skin with white flesh; very sweet and high in vitamin C.

Compact varieties with shorter stems are easier to manage in containers, while climbing varieties may require trellises or supports.


Selecting the Right Container

The choice of container is critical for dragon fruit growth:

  • Material: Terracotta, plastic, or ceramic pots work well. Terracotta allows better aeration, while plastic retains moisture.
  • Size: Minimum 18–24 inches in diameter and depth for young plants. Mature dragon fruit may require larger containers (24–30 inches).
  • Drainage: Ensure adequate drainage holes to prevent waterlogging, which can cause root rot.
  • Support: Use stakes, trellises, or cages to support vertical growth.

Soil Requirements

Dragon fruit thrives in well-draining soil with moderate fertility:

  • Composition: Mix equal parts of cactus soil, sandy loam, and organic compost.
  • pH Range: Slightly acidic to neutral (6.0–7.0).
  • Nutrient Management: Add slow-release fertilizers rich in potassium and phosphorus for flowering and fruiting.

Avoid heavy clay soils or water-retentive media, as these can harm the roots.


Planting Dragon Fruit in Containers

Step-by-Step Process:

  1. Prepare the Container: Ensure it is clean and has adequate drainage holes.
  2. Add Soil: Fill the container with well-draining soil mixture.
  3. Planting Cuttings or Seedlings:
    • Use 12–18 inch cuttings or healthy seedlings.
    • Bury the cutting 2–3 inches into the soil.
    • Support with a stake or trellis for climbing varieties.
  4. Watering: Water lightly after planting to settle the soil. Avoid waterlogging.
  5. Positioning: Place the container in a sunny location with at least 6–8 hours of direct sunlight daily.

Watering Practices

Dragon fruit is a succulent cactus and has moderate water requirements:

  • Frequency: Water every 2–3 days during the growing season, reducing to once a week in winter.
  • Method: Deep watering to reach the roots; avoid wetting the stem excessively.
  • Signs of Overwatering: Yellowing stems, root rot, and fungal infections.
  • Signs of Underwatering: Wrinkled stems and slow growth.

Fertilization

Balanced nutrition is essential for vigorous growth and fruiting:

  • Nitrogen (N): Promotes vegetative growth.
  • Phosphorus (P): Encourages flowering and root development.
  • Potassium (K): Supports fruit development and overall plant health.

Fertilization Schedule:

  • Use a balanced fertilizer (10:10:10 or 15:15:15) every 6–8 weeks during the growth season.
  • Supplement with organic compost or worm castings for nutrient-rich soil.

Pruning and Training

Pruning helps maintain plant health, shape, and fruit production:

  1. Remove damaged, diseased, or weak stems.
  2. Trim overcrowded branches to allow sunlight penetration and airflow.
  3. Train climbing stems along a trellis or stake to encourage vertical growth.
  4. Maintain a manageable height for container growth, typically 3–4 feet.

Pollination and Flowering

Dragon fruit flowers are nocturnal and often require pollination for fruit set:

  • Self-Pollinating Varieties: Some types can set fruit without cross-pollination.
  • Hand Pollination: For higher yield, gently transfer pollen from stamens to stigma using a small brush.
  • Flowering Season: Typically blooms in summer; flowers last 1–2 nights.
  • Indicators of Fruit Set: Swelling at the base of flowers after successful pollination.

Pest and Disease Management

Dragon fruit is relatively hardy but can be affected by pests and diseases:

Common Pests:

  • Mealybugs: Remove by hand or use insecticidal soap.
  • Aphids: Spray with neem oil or insecticidal soap.
  • Spider Mites: Maintain humidity and clean leaves regularly.

Common Diseases:

  • Root Rot: Caused by overwatering; ensure well-draining soil.
  • Stem Rot and Leaf Spot: Remove affected parts; apply fungicides if necessary.
  • Sunburn: Provide partial shade during intense heat.

Harvesting Dragon Fruit

Dragon fruit is ready to harvest 30–50 days after flowering depending on variety and climate:

  • Indicators of Ripeness:
    • Skin color changes (pink, red, or yellow) depending on variety.
    • Slight softening when gently pressed.
  • Harvesting Technique:
    • Use a sharp knife or scissors to cut the fruit, leaving a small stem attached.
    • Avoid bruising the fruit to extend shelf life.
  • Post-Harvest Storage:
    • Store at 8–10°C for up to 2 weeks.
    • Room temperature storage is suitable for 3–5 days for immediate consumption.

Tips for Successful Container Cultivation

  1. Sunlight: Ensure 6–8 hours of direct sunlight daily. Rotate containers periodically.
  2. Temperature: Maintain 20–35°C for optimal growth; protect from frost.
  3. Container Size: Upgrade to larger containers as plants grow to accommodate root expansion.
  4. Support Structures: Trellises or cages prevent sprawling and support fruit-bearing stems.
  5. Regular Monitoring: Check for pests, nutrient deficiencies, and growth progress regularly.

Benefits of Growing Dragon Fruit in Containers

  • Health Benefits: Fresh dragon fruit is rich in fiber, antioxidants, and vitamins.
  • Aesthetic Value: Adds exotic beauty to balconies, patios, and gardens.
  • Sustainability: Reduces dependency on commercially sourced fruits.
  • Profit Potential: High market demand allows small-scale growers to earn income.

Conclusion

Growing dragon fruit in containers is a rewarding and manageable way to cultivate this exotic fruit at home or in urban settings. With proper container selection, soil preparation, watering, fertilization, pruning, and pest management, gardeners can enjoy fresh, nutrient-rich dragon fruit year after year.

By choosing compact varieties, ensuring optimal sunlight and drainage, and providing support for climbing stems, even small spaces can yield abundant harvests. Container cultivation not only brings the nutritional and economic benefits of dragon fruit closer to urban gardeners but also enhances the aesthetic appeal of home gardens, terraces, and patios.

With careful attention to plant care, flowering, and harvesting practices, dragon fruit in containers can thrive, providing a combination of exotic beauty, delicious fruit, and health benefits that make it a valuable addition to any garden or home-growing project.

Countries That Produce the Most Chrysanthemums

Countries That Produce the Most Chrysanthemums

Chrysanthemums, commonly known as “mums,” are among the most popular and widely cultivated flowering plants in the world. Renowned for their vibrant colors, diverse forms, and long-lasting blooms, chrysanthemums hold significant ornamental, cultural, and economic value. These flowers are cherished for home gardens, floral arrangements, landscaping, and special occasions, and they also play an important role in the floriculture industry.

The global production of chrysanthemums reflects both horticultural expertise and market demand. Understanding the countries that produce the most chrysanthemums provides insights into floriculture trends, export potential, and the economic impact of ornamental plants worldwide.


Chrysanthemums: An Overview

Chrysanthemums belong to the Asteraceae family, which also includes daisies and sunflowers. Originating from East Asia, particularly China and Japan, chrysanthemums have been cultivated for over 2,500 years and hold cultural significance in many countries.

Types of Chrysanthemums

  1. Disbudded or Single-Flower Chrysanthemums: Each stem produces one large bloom, commonly used in bouquets and arrangements.
  2. Spray Chrysanthemums: Multiple blooms per stem, ideal for decorative and garden purposes.
  3. Pompon Chrysanthemums: Small, spherical flowers popular in ornamental gardening.
  4. Florist Chrysanthemums: Grown commercially for the cut-flower industry.

Cultural and Economic Importance

  • Ornamental Value: Widely used in landscaping, home gardens, and floral designs.
  • Cultural Significance: Symbolizes longevity, honor, and celebration in countries like China, Japan, and Korea.
  • Economic Importance: A major floriculture crop, generating significant income for producers and exporters globally.

Top Chrysanthemum-Producing Countries

1. China

China is the undisputed leader in chrysanthemum production, with a long history of cultivation and advanced horticultural practices.

Production Highlights:

  • Annual production: Over 2 million metric tons of cut flowers and potted plants.
  • Major production regions: Zhejiang, Guangdong, Shandong, and Fujian provinces.
  • Both traditional garden varieties and modern florist chrysanthemums are cultivated.

Agricultural Practices:

  • Greenhouse cultivation ensures year-round production.
  • Tissue culture and selective breeding are widely used to develop new colors, forms, and disease-resistant varieties.

Exports:

  • Major export markets: Japan, Europe, the United States, and Southeast Asia.
  • Products include cut flowers, potted plants, and dried flowers for traditional medicinal use.

Market Insights:

  • China dominates both domestic and international markets due to large-scale production and technological advancements.

2. Japan

Japan is renowned for its chrysanthemums, especially for cultural and ceremonial purposes.

Production Highlights:

  • Annual production: Approximately 300,000–400,000 metric tons.
  • Key production regions: Shizuoka, Chiba, Tochigi, and Ibaraki prefectures.
  • Focus on ornamental and exhibition chrysanthemums, including giant blooms and intricate cultivars.

Cultural Significance:

  • Chrysanthemums are the national flower and a symbol of the Japanese imperial family.
  • “Kiku Matsuri” (Chrysanthemum Festivals) celebrate the flower with exhibitions of meticulously cultivated varieties.

Exports:

  • Japan exports cut flowers and potted chrysanthemums mainly to Europe and Asia.
  • Some specialized varieties are marketed internationally as premium ornamental flowers.

Market Insights:

  • Japan emphasizes quality and aesthetic value, with high investment in breeding, greenhouse technology, and pest control.

3. Netherlands

The Netherlands is a global hub for floriculture and a major exporter of chrysanthemums.

Production Highlights:

  • Annual production: Around 150,000–200,000 metric tons of cut flowers and potted plants.
  • Key regions: Aalsmeer, Westland, and Noord-Holland, which are central to the Dutch flower industry.

Agricultural Practices:

  • Advanced greenhouse systems, hydroponics, and automated harvesting techniques.
  • Dutch breeders develop new cultivars with improved shelf life, colors, and forms.

Exports:

  • Major export markets: Germany, France, UK, Scandinavia, and other European countries.
  • The Netherlands supplies a substantial portion of cut chrysanthemums to global floral markets.

Market Insights:

  • Dutch floriculture focuses on export-oriented high-value flowers, leveraging logistics hubs like Aalsmeer Flower Auction for global distribution.

4. Colombia

Colombia is a significant chrysanthemum producer in Latin America, particularly for cut flowers.

Production Highlights:

  • Annual production: Approximately 100,000–120,000 metric tons.
  • Key regions: Bogotá Plateau, Antioquia, and Cundinamarca.
  • Chrysanthemums are grown mainly as cut flowers for export.

Agricultural Practices:

  • Greenhouse cultivation and modern irrigation systems ensure year-round production.
  • High-altitude conditions provide optimal growth and long stems.

Exports:

  • Major export markets: United States, Canada, Europe, and Japan.
  • Colombia is among the top global exporters of cut chrysanthemums.

Market Insights:

  • Colombia benefits from favorable climate, proximity to the US market, and strong export infrastructure.

5. Kenya

Kenya has emerged as a leading African producer of chrysanthemums for the cut-flower industry.

Production Highlights:

  • Annual production: Approximately 80,000–100,000 metric tons.
  • Key regions: Rift Valley and Central Highlands.
  • Focus on cut flowers for international markets.

Agricultural Practices:

  • High-altitude regions with moderate temperatures enable high-quality flower production.
  • Modern greenhouses, drip irrigation, and integrated pest management are common.

Exports:

  • Major export markets: Europe (Netherlands, Germany, UK) and the Middle East.
  • Kenya exports chrysanthemums along with roses, carnations, and lilies.

Market Insights:

  • The cut-flower industry is a major source of foreign exchange, employment, and rural development in Kenya.

6. Other Notable Producers

Several other countries contribute to global chrysanthemum production:

  • United States: Produces chrysanthemums mainly in California and Florida for cut flowers and potted plants.
  • Ecuador: Emergent exporter of cut chrysanthemums to North America and Europe.
  • Italy and France: Focus on garden and exhibition chrysanthemums.
  • India: Produces chrysanthemums for domestic markets and festivals, with growing export potential.

Global Chrysanthemum Trade Dynamics

Exports and Imports

  • The Netherlands and Colombia dominate international cut-flower trade.
  • Japan and China supply both ornamental and potted chrysanthemums.
  • Imports are concentrated in Europe, North America, and Asia, where floriculture demand is high.

Market Trends

  • Rising demand for ornamental plants, home gardening, and floristry drives global production.
  • Seasonal events, festivals, and cultural significance boost chrysanthemum consumption.
  • Value-added products, such as dried chrysanthemums for teas and herbal remedies, expand market potential.

Challenges in Chrysanthemum Production

  • Pests and Diseases: Aphids, spider mites, powdery mildew, and leaf spot reduce yield and quality.
  • Climate Sensitivity: Optimal growth requires controlled temperature, humidity, and light conditions.
  • Labor-Intensive Practices: Harvesting, disbudding, and pruning require skilled labor.
  • Market Competition: International trade demands consistent quality and packaging standards.

Future Trends in Chrysanthemum Production

  1. Sustainable Cultivation: Increased adoption of integrated pest management, organic fertilizers, and energy-efficient greenhouses.
  2. Technological Advancements: Automation in greenhouses, tissue culture propagation, and smart irrigation systems will boost production.
  3. Value-Added Products: Chrysanthemum teas, essential oils, and dried flowers for herbal remedies and cosmetics.
  4. Expansion of Export Markets: Emerging markets in Asia, North America, and the Middle East offer new opportunities.
  5. Breeding Innovations: Development of new colors, larger blooms, and longer-lasting varieties for ornamental and commercial purposes.

Conclusion

Chrysanthemums are among the world’s most cherished ornamental plants, combining aesthetic appeal, cultural significance, and economic value. The countries that produce the most chrysanthemums include China, Japan, the Netherlands, Colombia, Kenya, the United States, and Ecuador, each contributing unique varieties, cultivation expertise, and market-focused production to the global floriculture industry.

China dominates production by volume, supplying both domestic and international markets with garden and florist chrysanthemums. Japan emphasizes cultural and exhibition varieties, while the Netherlands and Colombia specialize in high-value cut flowers for global trade. Kenya’s production highlights the potential of African floriculture in international markets.

Global chrysanthemum production and trade are shaped by horticultural innovation, consumer demand, cultural significance, and export infrastructure. With rising interest in ornamental plants, sustainable floriculture practices, and value-added chrysanthemum products, production and trade are expected to grow steadily, offering opportunities for economic development, employment, and global market expansion.

Chrysanthemums not only beautify gardens and homes but also sustain floriculture economies, strengthen trade networks, and enhance cultural traditions worldwide. Understanding the leading chrysanthemum-producing countries provides insights into the intersection of agriculture, commerce, and cultural appreciation in the ornamental plant industry.

Balcony Garden Ideas That Save Space and Look Stunning

Balcony Garden Ideas That Save Space and Look Stunning

Urban living often comes with a common challenge: limited outdoor space. While city apartments and flats may not provide sprawling lawns or large backyards, they do offer one often-overlooked area that can be transformed into a green haven — the balcony. A well-designed balcony garden not only adds beauty to your home but also enhances air quality, reduces stress, and maximizes small spaces in creative ways.

Whether you have a tiny balcony overlooking busy streets or a moderately sized one with more breathing room, there are countless design possibilities. With the right plants, containers, and layout, your balcony can become a stylish sanctuary. Let’s explore balcony garden ideas that save space and look stunning — perfect for modern urban homes.


1. Vertical Gardens: Greening Your Walls

When floor space is limited, think vertically. Vertical gardens are one of the most popular small-space solutions for balcony gardening. By installing a living wall, trellis, or hanging planter system, you can cultivate a wide variety of plants without sacrificing valuable floor area.

  • Best plants for vertical gardens: herbs (basil, mint, thyme), succulents, ferns, pothos, and philodendrons.
  • DIY approach: Use wooden pallets, wall-mounted racks, or recycled shoe organizers as pocket planters.
  • Aesthetic appeal: Vertical greenery doubles as a privacy screen while making your balcony look lush and vibrant.

Not only do vertical gardens save space, but they also improve air circulation and provide a soothing, natural backdrop for relaxation.


2. Tiered Plant Stands for Compact Beauty

Tiered plant stands are ideal for balconies with limited space, allowing you to display multiple plants in a small footprint. These stands come in various materials — wood, metal, or plastic — and can fit neatly in corners.

  • Why they work: They create levels of greenery, adding depth and dimension to your balcony.
  • What to grow: Place larger plants like peace lilies or snake plants at the bottom, medium-sized herbs or ferns in the middle, and trailing plants such as ivy or spider plants on the top tiers for a cascading effect.
  • Design tip: Opt for foldable or portable stands if you want flexibility in rearranging your balcony garden.

This setup is not just practical but also visually appealing, turning a small balcony into a dynamic green showcase.


3. Hanging Planters for Airy Elegance

Hanging planters are a perfect way to utilize the upper space of your balcony without crowding the floor. They can be suspended from ceiling hooks, balcony railings, or even wall brackets.

  • Best options: macramé plant hangers, colorful ceramic pots, or lightweight plastic baskets.
  • Plant suggestions: trailing plants like string of pearls, English ivy, golden pothos, or flowering species such as petunias and geraniums.
  • Pro tip: Use self-watering hanging planters to minimize maintenance and ensure consistent moisture for your plants.

Hanging greenery adds a whimsical, floating-garden charm that’s sure to impress guests and neighbors alike.


4. Rail Planters for Smart Space Use

Balcony railings are prime real estate for gardens. Attaching planters directly to the railings frees up floor space while giving your balcony a neat, organized look.

  • Best suited plants: herbs like parsley, coriander, and rosemary; or colorful blooms like marigolds, pansies, and begonias.
  • Design advantage: Rail planters add a splash of color that can be enjoyed both from inside the home and outside on the street.
  • Safety tip: Choose sturdy, secure planters designed for balcony rails to avoid accidents.

Rail planters also create an instant mini-garden effect, making them a favorite choice for urban gardeners.


5. Compact Furniture with Built-in Planters

If you love spending time on your balcony, consider investing in compact furniture that doubles as plant containers. Tables with built-in planter boxes or benches with integrated side planters serve both decorative and practical purposes.

  • Space-saving benefit: Combines seating and gardening in one solution.
  • Ideal plants: Succulents, small flowering plants, or low-maintenance indoor plants.
  • Style tip: Choose sleek, modern furniture with neutral finishes to highlight the greenery.

This design approach ensures your balcony feels like a cozy retreat while staying functional and uncluttered.


6. Mini Edible Gardens for Fresh Produce

Imagine plucking fresh herbs, tomatoes, or strawberries right from your balcony garden! Even with limited space, you can create a mini edible garden with smart planting strategies.

  • What to grow: cherry tomatoes, chili peppers, dwarf citrus trees, strawberries, lettuce, and spinach.
  • Containers to use: grow bags, raised beds, or vertical garden kits designed for vegetables.
  • Extra tip: Companion planting (like basil with tomatoes) maximizes yields in tight spaces.

This idea not only saves money on groceries but also ensures you have access to fresh, organic produce year-round.


7. Container Variety for Year-Round Beauty

One of the best ways to keep your balcony garden looking stunning in every season is to use a mix of containers. Different shapes, colors, and sizes create visual interest while supporting diverse plant types.

  • Spring/Summer: bright flowers like geraniums, petunias, and zinnias.
  • Autumn: ornamental cabbages, chrysanthemums, and marigolds.
  • Winter: hardy plants like pansies, evergreens, or succulents.
  • Pro tip: Use lightweight fiberglass or resin pots for easy rearrangement.

By switching seasonal plants, your balcony will always feel fresh and inviting.


8. Zen-Inspired Balcony Retreat

For those who prefer a minimalist yet calming aesthetic, a Zen-inspired garden can transform your balcony into a serene oasis.

  • Key elements: bamboo plants, small water features, white pebbles, and bonsai trees.
  • Furniture: low wooden seating, floor cushions, or foldable chairs.
  • Ambiance: Add solar lanterns or string lights for evening relaxation.

A Zen balcony garden is perfect for meditation, reading, or unwinding after a long day.


9. Multipurpose Storage and Planter Combos

Balconies often double as storage areas in urban homes. To avoid clutter, choose multipurpose storage units that integrate planters. For example, a storage bench can also serve as a base for potted plants, or a small shelf unit can hold both tools and greenery.

This helps maximize the functionality of your balcony while keeping it tidy and stylish.


10. Lighting to Enhance the Greenery

No matter how well-planned your balcony garden is, lighting plays a vital role in its overall look.

  • Daytime tip: Position mirrors or reflective surfaces to bounce sunlight onto shaded plants.
  • Evening tip: Use string lights, lanterns, or LED spotlights to highlight plants and create a warm, cozy vibe.

Good lighting ensures that your balcony garden looks stunning both day and night.


Final Thoughts

Balcony gardens prove that size is no barrier to creativity and beauty. By using vertical space, compact containers, rail planters, and multipurpose furniture, you can design a balcony garden that saves space and looks spectacular. Whether your goal is to grow herbs, create a floral paradise, or simply enjoy a peaceful corner of greenery, these ideas will help you craft a balcony that reflects your style and maximizes every inch of available space.

Urban living doesn’t have to mean sacrificing nature. With smart planning, your balcony can become your personal green escape — a place that not only impresses your neighbors but also nurtures your well-being.

5 Aquatic Plants to Beautify Home Aquariums

5 Aquatic Plants to Beautify Home Aquariums

Aquariums are more than just homes for fish—they are living art pieces that can transform a room into a serene and refreshing space. While colorful fish often grab attention, aquatic plants are the true unsung heroes of a healthy, beautiful aquarium. They not only add vibrant greenery and texture but also improve water quality, provide oxygen, and create a natural environment that supports fish and other aquatic creatures.

Whether you are a beginner aquarist or a seasoned aquarium enthusiast, incorporating live plants into your setup is one of the best decisions you can make. This article will explore five stunning aquatic plants that can beautify your home aquarium while also contributing to its ecosystem.


Why Add Aquatic Plants to Your Aquarium?

Before diving into specific plant options, it’s important to understand the many benefits they bring:

  • Aesthetic appeal: Plants add depth, contrast, and a natural look, making aquariums visually stunning.
  • Oxygenation: Live plants release oxygen during photosynthesis, improving water quality.
  • Natural filtration: Plants absorb excess nutrients like nitrates, reducing algae growth.
  • Shelter for fish: Fish use plants for hiding, breeding, and resting.
  • Stress reduction: Both fish and humans benefit from the calming effects of lush greenery.

With that in mind, let’s explore five of the most attractive aquatic plants you can add to your aquarium today.


1. Anubias (Anubias barteri)

Why It’s Great:

Anubias is one of the most popular aquarium plants due to its hardy nature and striking appearance. Its broad, dark-green leaves provide a bold backdrop and complement colorful fish beautifully. Anubias grows slowly, which makes it low-maintenance and suitable for beginners.

Best Conditions:

  • Light: Low to moderate
  • Temperature: 72–82°F (22–28°C)
  • Substrate: Doesn’t need to be buried; thrives when attached to driftwood or rocks
  • Maintenance: Minimal pruning required

Design Tip:

Attach Anubias to decorative rocks or driftwood for a natural and artistic look. Its lush green leaves make it ideal for midground or background placement in aquariums.


2. Java Fern (Microsorum pteropus)

Why It’s Great:

Java Fern is another beginner-friendly plant that grows well even in low light. Its unique, long, and leathery leaves create a dramatic texture, making aquariums look dynamic. Unlike many plants, Java Fern doesn’t require planting in soil—it thrives when tied to stones or driftwood.

Best Conditions:

  • Light: Low to moderate
  • Temperature: 68–82°F (20–28°C)
  • Substrate: No substrate needed; attach to hardscape
  • Maintenance: Occasional trimming of older leaves

Design Tip:

Position Java Fern in clusters around hardscape features like rocks or wood. Their deep green tones contrast beautifully with brightly colored fish such as guppies or neon tetras.


3. Amazon Sword (Echinodorus amazonicus)

Why It’s Great:

Amazon Sword is famous for its large, sword-shaped leaves that can transform an aquarium into a lush underwater jungle. This plant grows quickly and adds impressive height, making it perfect for background planting. Its dense foliage also provides excellent hiding spots for shy fish.

Best Conditions:

  • Light: Moderate to high
  • Temperature: 72–82°F (22–28°C)
  • Substrate: Nutrient-rich substrate required
  • Maintenance: Occasional pruning of excess growth

Design Tip:

Use Amazon Swords as focal points in the background of larger aquariums. Pair them with smaller foreground plants like Dwarf Hairgrass for a layered effect that creates depth and perspective.


4. Hornwort (Ceratophyllum demersum)

Why It’s Great:

Hornwort is a fast-growing, adaptable plant that floats freely or can be anchored in substrate. Its fine, feathery leaves add a soft, delicate texture to aquariums. It’s especially beneficial for fish fry (baby fish), as it provides shelter and protection. Hornwort also helps control algae by competing for nutrients.

Best Conditions:

  • Light: Moderate
  • Temperature: 59–86°F (15–30°C)
  • Substrate: Not required; can float or be anchored
  • Maintenance: Frequent trimming may be needed due to rapid growth

Design Tip:

Allow Hornwort to float at the surface for a natural, wild appearance. Its airy texture looks especially striking in aquariums with bettas, goldfish, or community fish.


5. Water Wisteria (Hygrophila difformis)

Why It’s Great:

Water Wisteria is a versatile plant known for its bright green, lace-like leaves that add vibrancy to any aquarium. It can be planted in the substrate or left floating, making it highly adaptable. Besides its visual appeal, Water Wisteria acts as a natural water purifier, absorbing toxins and helping to maintain balance in the tank.

Best Conditions:

  • Light: Moderate to high
  • Temperature: 70–82°F (21–28°C)
  • Substrate: Nutrient-rich soil preferred
  • Maintenance: Regular trimming to prevent overgrowth

Design Tip:

Plant Water Wisteria in the midground of your aquarium. Its finely divided leaves create a soft, lush look that contrasts well with larger-leaved plants like Anubias or Amazon Sword.


Tips for Maintaining Healthy Aquatic Plants

Adding aquatic plants is only the first step. To ensure they thrive and keep your aquarium beautiful, follow these care tips:

  1. Choose the right lighting – Different plants require different levels of light. Too little light will stunt growth, while too much may encourage algae.
  2. Use proper substrate – Some plants thrive without soil, but others need nutrient-rich substrates to grow well.
  3. Fertilize when needed – Liquid fertilizers or root tabs can help plants absorb essential nutrients like iron and potassium.
  4. Trim regularly – Prevent overgrowth by pruning dead or excess leaves. This encourages new, healthy growth.
  5. Maintain stable water conditions – Regular water changes and monitoring pH, temperature, and hardness are key to keeping plants and fish healthy.

Designing a Beautiful Planted Aquarium

Creating an attractive aquarium is like designing a miniature landscape. Here are some creative ideas:

  • Foreground plants: Use shorter species like Dwarf Hairgrass or Cryptocoryne to create a lush carpet effect.
  • Midground plants: Opt for medium-height plants such as Water Wisteria or Anubias to provide balance.
  • Background plants: Use taller plants like Amazon Sword or Vallisneria to add height and depth.
  • Floating plants: Add plants like Hornwort or Duckweed for a natural canopy that diffuses light.
  • Hardscape integration: Combine driftwood, rocks, and plants for a realistic, nature-inspired look.

Conclusion

Aquatic plants are essential for creating a thriving, visually captivating aquarium. From the hardy Anubias to the elegant Amazon Sword, each plant brings its own charm and ecological benefits. Whether you prefer the airy softness of Hornwort or the textured vibrancy of Water Wisteria, these plants transform aquariums into living works of art while keeping the ecosystem balanced.

By carefully selecting and maintaining the right aquatic plants, you can design an aquarium that not only impresses guests but also provides a healthy, stress-free environment for your fish. So, the next time you plan your aquarium, don’t just think about the fish—let plants take center stage too.

How to Build a Vertical Herb Wall in Your Kitchen

How to Build a Vertical Herb Wall in Your Kitchen

Gardening is no longer confined to outdoor spaces. For urban dwellers, apartment residents, and anyone with limited outdoor space, vertical gardening offers a beautiful, practical solution to keep plants thriving indoors. One of the most rewarding indoor gardening projects is building a vertical herb wall in your kitchen. Not only does it provide fresh herbs at your fingertips for cooking, but it also enhances your kitchen décor, improves air quality, and makes your space feel more vibrant.

This article will guide you step by step on how to create your own vertical herb wall, exploring design ideas, material choices, plant selection, and maintenance tips to keep your indoor herb garden flourishing year-round.


Why Build a Vertical Herb Wall?

Before diving into the “how-to,” let’s explore the “why.” A vertical herb wall isn’t just trendy—it’s practical, sustainable, and beneficial in many ways:

  1. Space-Saving Solution – Vertical designs maximize limited kitchen space, especially in small apartments.
  2. Fresh Herbs Anytime – No more store-bought bunches wilting in your fridge. You’ll always have fresh herbs at hand.
  3. Eco-Friendly Lifestyle – Growing your own herbs reduces packaging waste and your carbon footprint.
  4. Health Benefits – Indoor plants help purify the air, reducing toxins and improving humidity levels.
  5. Aesthetic Appeal – A green wall doubles as a striking kitchen feature, blending functionality with beauty.

Step 1: Choosing the Right Location

The success of your vertical herb wall starts with location selection. Herbs need light, warmth, and accessibility. Here’s what to consider:

  • Natural Light: Most herbs thrive in 4–6 hours of sunlight. Place your herb wall near a south-facing window for maximum exposure.
  • Artificial Lighting: If your kitchen lacks sufficient sunlight, supplement with LED grow lights.
  • Accessibility: Position your wall so you can easily water, prune, and harvest your herbs.
  • Ventilation: Ensure good air circulation to prevent mold or fungal issues.

Tip: Avoid areas directly above the stove, as heat and steam may damage delicate plants.


Step 2: Selecting the Structure or Framework

There are multiple ways to design your herb wall depending on your kitchen size, budget, and style preference. Here are some popular options:

  1. Wall-Mounted Planters
    • Install small wall-mounted pots, jars, or containers on a wooden or metal grid.
    • Flexible and easy to customize with paint or finishes.
  2. Hanging Pocket Organizers
    • Fabric or felt planters with multiple pockets are lightweight and water-resistant.
    • Perfect for renters since they cause minimal wall damage.
  3. DIY Wooden Pallet Garden
    • Repurpose an old pallet, add lined compartments, and mount it vertically.
    • Rustic, cost-effective, and eco-friendly.
  4. Magnetic or Mason Jar Herb Wall
    • Attach magnetic strips to jars or cans and stick them to a metal sheet.
    • Stylish and space-saving, ideal for smaller kitchens.
  5. Freestanding Vertical Shelf
    • For those who prefer not to drill into walls, a tiered vertical stand works well.

Step 3: Choosing the Right Containers

Your herb wall’s success depends on the right containers:

  • Drainage: Ensure each pot has proper drainage holes to prevent root rot.
  • Size: Herbs don’t need large pots; 6–8 inches in depth is usually enough.
  • Material: Terracotta, ceramic, or breathable fabric pots are great choices.
  • Liners: If using wood or fabric, line the inside with plastic to retain moisture.

Step 4: Selecting Herbs for Your Kitchen Wall

Not all herbs thrive indoors, so choose varieties that adapt well to container gardening. Here are some of the best herbs for your vertical wall:

  • Basil – Loves warmth and sunlight, perfect for Italian dishes.
  • Parsley – Hardy and versatile, grows well indoors.
  • Cilantro (Coriander) – Great for Asian and Mexican cuisines.
  • Mint – Refreshing, fast-growing, but requires pruning to prevent spreading.
  • Chives – Easy to grow, great for garnishing.
  • Thyme – Hardy and aromatic, perfect for roasts and soups.
  • Oregano – Thrives in containers and enhances Mediterranean meals.
  • Rosemary – Needs bright light, adds a woody fragrance and flavor.

Tip: Group herbs with similar light and water needs together for easier maintenance.


Step 5: Soil, Planting, and Watering

  • Soil: Use a high-quality potting mix with good drainage. Avoid heavy garden soil.
  • Planting: Sow seeds directly or transplant nursery seedlings. Ensure proper spacing so herbs don’t overcrowd.
  • Watering: Herbs prefer slightly moist but not soggy soil. Overwatering is the most common mistake.
  • Fertilizing: Feed your herbs monthly with an organic liquid fertilizer for consistent growth.

Step 6: Installing Lighting (If Needed)

If your kitchen lacks natural sunlight, installing grow lights is essential.

  • LED Grow Lights: Energy-efficient, available in clip-on or strip forms.
  • Placement: Keep lights 6–12 inches above the plants.
  • Timing: Mimic natural daylight cycles by keeping lights on for 12–14 hours daily.

Step 7: Maintenance and Harvesting

Maintaining your vertical herb wall ensures longevity and steady growth.

  • Pruning: Regularly trim herbs to encourage bushy growth.
  • Pest Control: Watch for aphids, spider mites, or fungus gnats. Use neem oil or insecticidal soap if needed.
  • Rotation: Occasionally rotate containers for even light exposure.
  • Harvesting: Harvest by cutting above a leaf node. Never remove more than one-third of the plant at once.

Step 8: Adding Creative Touches

Your herb wall should be both functional and visually appealing. Consider these creative design elements:

  • Labels: Use chalkboard tags, wooden stakes, or painted markers for a personalized touch.
  • Decorative Pots: Mix colors and textures for a lively look.
  • Integrated Shelving: Combine herbs with small kitchen décor items for a cohesive design.
  • Theme Garden: Create themed walls like a Mediterranean herb wall (basil, oregano, rosemary, thyme) or an Asian-inspired wall (cilantro, lemongrass, Thai basil).

Troubleshooting Common Problems

  1. Herbs Turning Yellow → Likely overwatering or poor drainage.
  2. Leggy Growth → Insufficient light; move closer to window or add grow lights.
  3. Wilting Plants → Underwatering or excessive heat from kitchen appliances.
  4. Slow Growth → Lack of nutrients; add fertilizer.

Long-Term Benefits of a Kitchen Herb Wall

A vertical herb wall is more than a décor feature—it’s a lifestyle upgrade. Over time, you’ll notice:

  • Reduced grocery costs by growing your own herbs.
  • Fresher, healthier meals enhanced with aromatic flavors.
  • A greener, more eco-conscious kitchen environment.
  • A therapeutic and calming daily routine through plant care.

Conclusion

Building a vertical herb wall in your kitchen is a creative, practical, and rewarding project that transforms your cooking space into a fresh, green sanctuary. By choosing the right structure, selecting easy-to-grow herbs, and maintaining them with proper care, you can enjoy year-round harvests right at your fingertips. Whether you prefer a rustic wooden pallet, sleek wall-mounted jars, or a freestanding shelf, the design possibilities are endless.

With just a little effort, you’ll create not only a stunning kitchen feature but also a living pantry that elevates your lifestyle, improves your health, and makes cooking a more enjoyable experience.

Garden Container Ideas for Every Season

Garden Container Ideas for Every Season

Gardening has always been a fulfilling and therapeutic activity, but not everyone has the luxury of vast outdoor spaces. For city dwellers, small backyards, or apartment balconies, container gardening is a versatile and practical solution. Containers not only allow you to grow plants in limited spaces but also offer flexibility to move, arrange, and redesign your garden throughout the year. The beauty of container gardening lies in its adaptability—you can tailor your choices of plants, arrangements, and themes to suit every season.

In this article, we’ll explore creative container garden ideas for spring, summer, fall, and winter, along with tips on container selection, plant combinations, and seasonal maintenance to help your garden bloom beautifully year-round.


Why Choose Container Gardening?

Before diving into seasonal ideas, it’s worth understanding why container gardening is so popular:

  1. Space Efficiency – Perfect for balconies, patios, rooftops, or even windowsills.
  2. Mobility – Containers can be rearranged or moved indoors during extreme weather.
  3. Versatility – From flowers to vegetables and herbs, almost anything can thrive in containers.
  4. Aesthetic Appeal – Containers add structure, design, and style to your outdoor or indoor space.
  5. Seasonal Adaptability – Easily switch out plants to match the season without redoing the entire garden.

Spring Container Garden Ideas

Spring is the season of rebirth and color, making it the perfect time to refresh your containers. After the long winter, your garden can come alive with vibrant blooms and lush greenery.

Best Plants for Spring Containers:

  • Bulbs: Tulips, daffodils, and hyacinths offer early color.
  • Annuals: Pansies, violas, and petunias are hardy and cheerful.
  • Herbs: Mint, parsley, and cilantro thrive in cooler spring temperatures.

Design Tips:

  • Layering for Impact: Place tall flowers like tulips in the center or back, medium plants like pansies in the middle, and trailing ivy or lobelia around the edges.
  • Pastel-Themed Containers: Use soft pinks, purples, and yellows for a fresh, spring-like feel.
  • Upcycled Touches: Old watering cans, baskets, or wooden crates can make rustic and eco-friendly containers.

Example Arrangement:

A galvanized metal tub filled with tulips in the center, bordered by pastel pansies, with creeping ivy spilling over the sides creates a lush and inviting spring display.


Summer Container Garden Ideas

Summer is all about bright colors, lush foliage, and heat-tolerant plants. Containers can thrive in summer if you choose hardy, sun-loving species and ensure proper watering.

Best Plants for Summer Containers:

  • Flowers: Geraniums, marigolds, zinnias, and begonias.
  • Edibles: Cherry tomatoes, peppers, and basil.
  • Tropical Foliage: Caladiums, elephant ears, or ornamental grasses.

Design Tips:

  • Bold Color Combinations: Bright red geraniums paired with sunny yellow marigolds create an eye-catching display.
  • Tropical Theme: Use banana plants or palms in large pots to bring vacation vibes to your backyard.
  • Vertical Gardening: Hanging baskets with trailing petunias or ferns maximize small spaces.

Example Arrangement:

A large terracotta pot with zinnias in multiple colors, surrounded by creeping lantana and topped with an ornamental grass in the center for height.


Fall Container Garden Ideas

Fall brings rich, earthy tones and cooler weather, making it the perfect season for warm, cozy container displays. Containers can extend your garden’s beauty even as the outdoor landscape begins to fade.

Best Plants for Fall Containers:

  • Flowers: Chrysanthemums, asters, and pansies.
  • Foliage: Ornamental kale, Swiss chard, and coleus.
  • Seasonal Accents: Pumpkins, gourds, and decorative grasses.

Design Tips:

  • Rustic Charm: Use wooden barrels, wicker baskets, or copper pots for a cozy autumn look.
  • Color Palette: Deep oranges, burgundy, and gold reflect the fall season beautifully.
  • Mix Textures: Pair flowering plants with leafy vegetables for visual depth.

Example Arrangement:

A whiskey barrel filled with burgundy mums, ornamental kale, and trailing ivy, accented with small decorative pumpkins around the base.


Winter Container Garden Ideas

Many assume that gardening must pause in winter, but with the right container plants, your space can remain lively even during the colder months. Evergreen plants, hardy shrubs, and creative decorative accents make winter container gardens both striking and long-lasting.

Best Plants for Winter Containers:

  • Evergreens: Boxwood, dwarf spruce, or holly.
  • Winter Flowers: Pansies, hellebores, and cyclamen.
  • Accents: Pinecones, twigs, and berries (like winterberry).

Design Tips:

  • Layered Greenery: Use evergreen shrubs as the centerpiece, with trailing ivy or moss for ground cover.
  • Festive Containers: Red and white flowers, combined with holly or berries, give a holiday-inspired look.
  • Durable Materials: Choose frost-resistant containers like stone, metal, or heavy-duty resin.

Example Arrangement:

A large ceramic pot filled with dwarf spruce, red winterberry branches, and trailing ivy, decorated with pinecones for a festive winter display.


Tips for Successful Year-Round Container Gardening

Regardless of the season, container gardening requires consistent care and thoughtful planning. Here are essential tips to keep your garden thriving all year long:

  1. Choose the Right Containers
    • Ensure good drainage holes.
    • Match container size with plant growth needs.
    • Select materials suited to weather (e.g., avoid thin plastic in winter).
  2. Use Quality Potting Mix
    • Opt for lightweight, well-draining soil rather than garden soil.
    • Add compost for nutrients.
  3. Watering and Drainage
    • Summer requires frequent watering; in winter, water sparingly.
    • Avoid waterlogged soil, which can cause root rot.
  4. Fertilization
    • Use slow-release fertilizers in spring and summer.
    • Avoid heavy fertilizing in winter when plant growth slows down.
  5. Seasonal Plant Rotation
    • Swap out seasonal plants to keep containers looking fresh.
    • Save perennials or shrubs by replanting them in garden beds after their container season ends.
  6. Creative Styling
    • Use decorative containers (ceramic, terracotta, metal, or wooden).
    • Experiment with color palettes, plant heights, and textures.
    • Incorporate seasonal décor such as lanterns, fairy lights, or festive ornaments.

Conclusion

Container gardening is more than just a practical solution for small spaces—it’s a year-round opportunity to express creativity, enhance your surroundings, and enjoy the beauty of nature in every season. From the pastel blooms of spring to the vibrant colors of summer, the warm earthy tones of fall, and the festive greenery of winter, container gardens offer endless design possibilities.

By thoughtfully selecting plants and containers, experimenting with textures and seasonal colors, and maintaining proper care, you can ensure that your garden containers remain a stunning focal point throughout the year. Whether on a balcony, patio, or doorstep, your container garden will not only uplift your home’s charm but also reflect your personal style, impressing neighbors and bringing joy to your everyday life.

How to Upcycle Old Items Into Beautiful Planters

How to Upcycle Old Items Into Beautiful Planters

Gardening is more than just planting seeds—it’s about creativity, sustainability, and adding a personal touch to your green space. In today’s eco-conscious world, upcycling old items into planters has become a popular way to reduce waste while giving gardens and homes a unique charm. Instead of discarding unused objects, you can transform them into stunning containers for plants. From worn-out boots to antique furniture, the possibilities are endless.

This article explores creative ways to upcycle everyday items into planters, practical tips for making them functional, and the aesthetic benefits of introducing these unique containers into your garden or home.


Why Choose Upcycled Planters?

Before diving into the ideas, it’s important to understand why upcycling is such a powerful choice:

  1. Eco-Friendly Gardening
    By reusing items, you prevent them from ending up in landfills, contributing to a greener planet.
  2. Cost-Effective
    Upcycling eliminates the need to purchase new pots or planters, saving money.
  3. Unique Aesthetic
    Unlike store-bought pots, upcycled planters add individuality and character to your garden.
  4. Creative Expression
    Every project is an opportunity to unleash your imagination and showcase your personality.
  5. Conversation Starters
    Guests and neighbors will admire the quirky and innovative displays, making your garden memorable.

10 Creative Ideas for Upcycling Old Items Into Planters

1. Vintage Tea Pots and Cups

Old teapots, coffee mugs, or cups with chips and cracks make perfect homes for small succulents, herbs, or flowers. Their compact size makes them ideal for windowsills, balconies, or even kitchen counters. Drill a small hole at the bottom for drainage, and you’re good to go.


2. Rusty Wheelbarrows

A broken wheelbarrow might seem useless, but with a little creativity, it can become a show-stopping flower bed. Fill it with colorful blooms like petunias, marigolds, or geraniums. The mobility of the wheelbarrow also allows you to reposition it depending on sunlight.


3. Old Boots or Shoes

Instead of discarding worn-out shoes, give them a second life as quirky planters. Leather boots work especially well because they provide durability and a rustic look. Fill them with soil and grow trailing plants like ivy, or small flowers for a whimsical effect.


4. Wooden Crates and Drawers

Vintage wooden crates or drawers can be transformed into rustic planters for herbs or seasonal flowers. Line them with landscaping fabric to prevent soil leakage, and add a coat of weatherproof sealant if placing them outdoors. Stacked crates can even create a vertical garden.


5. Bathtubs and Sinks

An old claw-foot bathtub or sink can become a large centerpiece planter for your backyard. These items provide ample space for growing shrubs, vegetables, or a mix of vibrant flowers. Their vintage charm instantly elevates the look of your garden.


6. Bicycles with Baskets

If you have a rusty, unused bicycle, give it a second life by planting flowers in its baskets. Add a few trailing plants for a cascading effect. Place the bike against a wall or fence as a decorative accent.


7. Tires

Instead of burning or discarding old tires, paint them with bright, weather-resistant colors and use them as planters. You can stack them, hang them on walls, or simply place them flat on the ground. They’re great for growing ornamental plants or small shrubs.


8. Kitchen Colanders and Pots

Old colanders already come with drainage holes, making them perfect planters. With a quick paint job, they can become colorful additions to your balcony or garden. Similarly, dented cooking pots or pans can also be reused with a little creativity.


9. Furniture Planters

Transform old furniture such as dressers, cabinets, or chairs into statement planters. For example, drawers can be pulled out and filled with cascading flowers, while an old chair seat can hold a potted plant. This gives your garden a vintage, eclectic charm.


10. Plastic Bottles and Containers

Plastic waste can easily be upcycled into functional planters. Cut bottles in half, paint them, and hang them on walls for a vertical garden. Larger containers like gallon jugs can be repurposed for herbs or leafy greens.


Tips for Making Upcycled Planters Functional

While upcycling is fun and creative, functionality is equally important for plant health. Here are key tips to ensure success:

  1. Ensure Proper Drainage
    Most plants dislike soggy soil. Drill holes at the bottom of items without natural drainage.
  2. Use the Right Soil Mix
    Match the soil type to the plant’s needs—succulents need sandy soil, while vegetables require nutrient-rich mixes.
  3. Consider Plant Size
    Don’t overcrowd small containers with large plants. Choose compact species for limited spaces.
  4. Weatherproof When Necessary
    For wooden or metal items placed outdoors, apply a sealant to protect against moisture and rust.
  5. Placement Matters
    Ensure the planter gets the right amount of sunlight or shade depending on the plants you’re growing.

Best Plants for Upcycled Planters

Not all plants are suited to unconventional containers. Here are some great options for your upcycled planters:

  • Succulents & Cacti: Perfect for small containers like mugs, boots, or bottles.
  • Herbs (Mint, Basil, Parsley, Thyme): Great for teapots, drawers, or crates.
  • Trailing Plants (Ivy, Pothos, Petunias): Ideal for baskets, bicycles, or furniture.
  • Compact Flowers (Marigolds, Pansies, Begonias): Work well in boots, tins, or colanders.
  • Vegetables (Lettuce, Spinach, Radishes): Best for larger items like bathtubs, tires, or crates.

Aesthetic and Lifestyle Benefits

Upcycling old items into planters does more than beautify your home and garden:

  1. Adds Personality
    Every upcycled planter tells a story, whether it’s a childhood toy, a vintage teapot, or a piece of furniture with memories attached.
  2. Encourages Sustainable Living
    It fosters an eco-friendly lifestyle by reducing waste and repurposing everyday items.
  3. Budget-Friendly Gardening
    You don’t need expensive pots to create a stylish garden; creativity is enough.
  4. Boosts Mental Well-being
    Engaging in creative gardening reduces stress, improves mood, and enhances mindfulness.

Conclusion

Upcycling is more than a gardening trend—it’s a movement toward sustainability, creativity, and personal expression. By transforming everyday objects into unique planters, you not only reduce waste but also add character and charm to your living spaces. Whether it’s an old teapot on the kitchen windowsill, a bathtub filled with vibrant flowers, or a bicycle covered in cascading blooms, these creations breathe new life into forgotten items.

So, the next time you think of throwing something away, pause and ask: Could this become a beautiful planter? Chances are, it can—and your garden will thank you for it.